What’s Inside
- 1. Master Macro Lenses for Skincare Aesthetic Photography Texture
- 2. Ditch the Ring Light for Softbox Diffusers
- 3. Use North-Facing Windows for Natural Light
- 4. Buy Cheap Mirror Acrylic for Luxury Vibes
- 5. Stop Using Fake Plants Immediately
- 6. Stack Your Products on Acrylic Risers
- 7. Get Messy with Creative Smears and Swatches
- 8. Play with Water Droplets and Glycerin Sprays
- 9. Color Coordinate Your Seamless Backgrounds
- 10. Incorporate Raw Ingredients for Visual Context
- 11. Use Tweezers for Exact Prop Placement
- 12. Clean Every Single Speck of Dust Before Shooting
Last Tuesday at Whole Foods, I dropped a $42.00 glass bottle of Herbivore Botanicals Lapis Oil right on the polished concrete floor while trying to photograph it by the floral section. The blue oil went everywhere. It smelled like sweet blue tansy and total regret. I was trying to capture that perfect skincare aesthetic photography vibe for my blog, but I completely failed. The store manager wasn’t thrilled. Figuring out skincare aesthetic photography takes actual work. I’ve ruined so many expensive products trying to get the right shot. It’s not just pointing an iPhone at a jar of cream and hoping for the best. You need specific lighting, weird props, and a lot of patience. I tried doing this wrong for months before figuring it out. I’d buy random cheap props and wonder why my photos looked like a cluttered yard sale. Skip the cheap plastic props and the awful ring lights. They look terrible on camera. Let’s talk about the specific tools and setups that actually make your products look expensive and professional. I’ve wasted hundreds of dollars on the wrong gear. You don’t have to make the same mistakes I did. Learned that the hard way.
1. Master Macro Lenses for Skincare Aesthetic Photography Texture

I personally swear by using a dedicated macro lens if you want your shots to look professional. When I first started, I bought a cheap $14.99 clip-on macro lens from Target. It’s a massive mistake. The edges of the photos were completely blurry. You couldn’t see the texture of the product at all. It just looked like a blurry mess of color. To really nail skincare aesthetic photography, you need real glass. I highly recommend the Canon EF 100mm f/2.8L Macro IS USM. It costs exactly $899.00, which is steep, but it fixes everything. If you’re on a budget, the Laowa 60mm f/2.8 2x Ultra Macro Lens is around $449.00 and works incredibly well. I used the Laowa last week to shoot a 2 oz jar of Laneige Water Sleeping Mask ($32.00). With a normal lens, it just looks like blue slime. With the macro lens, you can see the tiny, microscopic water droplets forming on the surface of the gel. It communicates the hydrating efficacy of the product instantly. You can almost feel the cold, slippery texture just by looking at the photo. Don’t rely on your phone’s digital zoom. It ruins the resolution and makes the cream look grainy and cheap. Invest in the right glass. Trust me on this.
2. Ditch the Ring Light for Softbox Diffusers

Most people get this wrong when they start shooting beauty products. You buy a cheap ring light, set it up, and think you’re good to go. I bought a 10-inch ring light at Walmart for $24.98 last year. I tried to photograph a 1 oz bottle of Glossier Futuredew ($26.00). The glossy pink glass bottle reflected a harsh, bright white circle right in the middle of the label. It looked terrible and cheap. You can’t fix that glare in editing. You need soft, diffused lighting to minimize those harsh shadows and reflections. I switched to a Godox FV150 light unit. It costs $289.00. I paired it with a 32-inch rectangular diffuser panel. You position the softbox at a 45-degree angle to the product. I set the Godox light about three feet away from the table. This creates a really flattering, high-contrast look that wraps the light around the bottle instead of blasting it straight on. The soft light makes the liquid inside the bottle glow beautifully. It’s the secret to making inexpensive drugstore serums look like luxury spa treatments. Skip the harsh ring lights entirely. They belong on makeup tutorials, not product photography setups.
3. Use North-Facing Windows for Natural Light

If you aren’t ready to drop hundreds of dollars on studio lighting, you can absolutely use natural light. But you can’t just shoot anywhere. Direct sunlight creates aggressive, dark shadows that ruin the shot. You need to find a north-facing window in your house. North-facing windows provide a gentle, consistent glow all day long without the harsh direct beams of the sun. I set up a small folding table right next to my bedroom window. I was shooting a 4 oz bottle of CeraVe Hydrating Facial Cleanser ($14.99). The light was beautiful, but the side of the bottle facing away from the window was too dark. Here is a massive pro tip. You don’t need expensive reflectors. I drove to Costco and bought a massive 500-sheet ream of white printer paper for $8.99. I took one 8×11 inch sheet of paper, folded it in half so it would stand up, and placed it just out of the frame on the dark side of the bottle. The white paper bounced the soft window light right back onto the CeraVe label. It filled the shadows perfectly. The photo looked clean, organic, and highly professional. Honestly this changed how I shoot on cloudy days.

medicube Deep Vitamin C Capsule Serum | Hydrating Vitamin C
medicube Deep Vitamin C Capsule Serum | Hydrating Vitamin C Serum for has been one of the most consistently praised picks in this category. 230 reviewers averaged 4.5/5.
4. Buy Cheap Mirror Acrylic for Luxury Vibes
You want that high-end, glossy magazine look for your serums and creams. You don’t need a heavy marble countertop. You need reflective surfaces. I’m obsessed with using mirror acrylic sheets as a base. You can buy a 12×12 inch square of mirror acrylic on Amazon for exactly $14.99. I used one last month to photograph a 1.7 oz jar of Tatcha The Dewy Skin Cream ($72.00). I placed the heavy purple glass jar directly on the silver acrylic. The reflection underneath it was absolutely stunning. It created this dramatic, luxurious visual that makes the product look twice as expensive. The smooth surface of the acrylic contrasts beautifully with the rich, thick texture of the cream. One honest negative here. Mirror acrylic scratches if you even look at it wrong. I ruined my first sheet by sliding a heavy glass bottle across it. The scratch showed up in every single photo. You have to place the products straight down very gently. I also buy cheap glossy black acrylic sheets. They give a really moody, sophisticated vibe for nighttime skincare routines. Just keep a microfiber cloth handy because every single fingerprint will show up on camera. You might also like: 20 Stunning Tips Natural Skincare That Actually Work
5. Stop Using Fake Plants Immediately

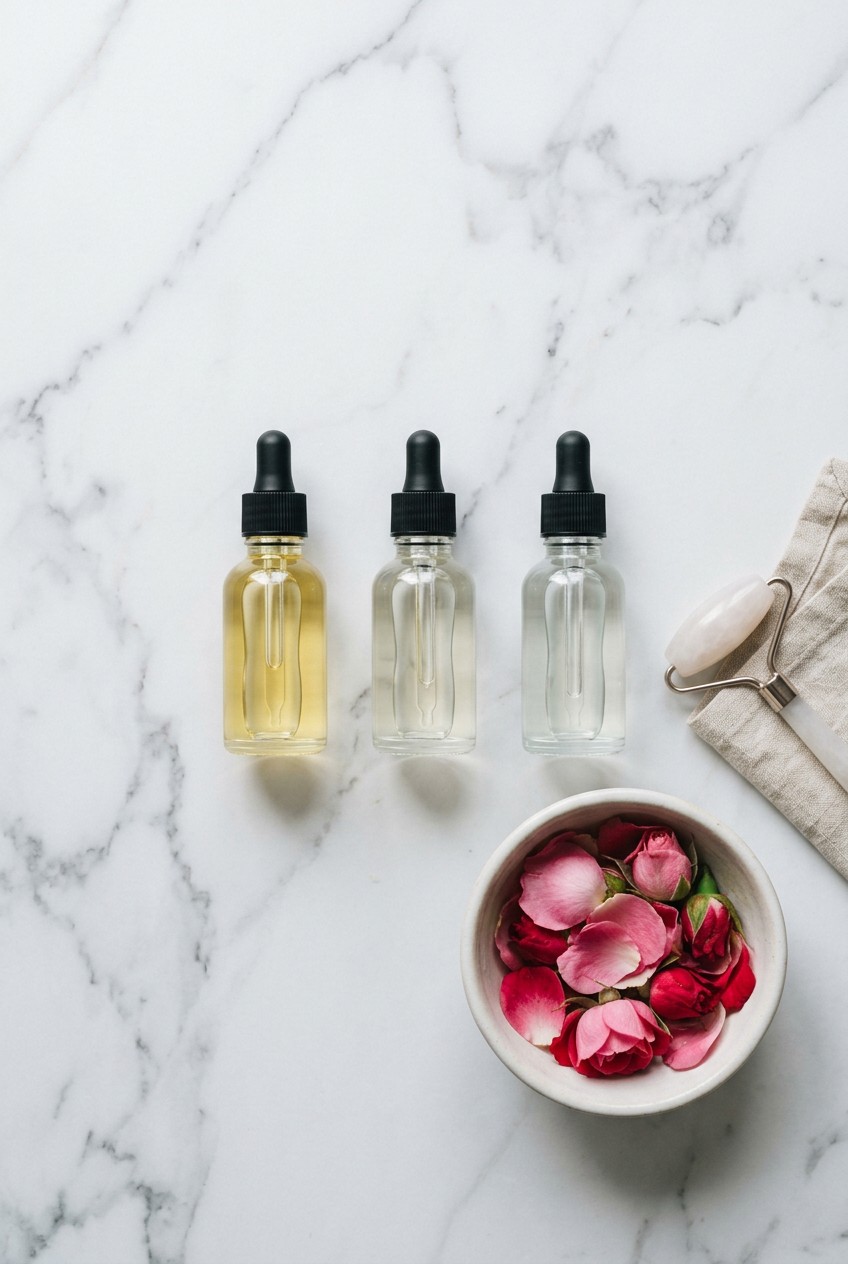
This is my biggest pet peeve. ALWAYS opt for fresh plants. Do not use silk plants or fake plastic flowers for your photo shoots. It’s better to have absolutely no props at all than to use something that is clearly artificial. I tried this wrong for months. I bought a bunch of fake plastic eucalyptus from a craft bin. I put it next to a 1 oz bottle of Biossance Squalane + Vitamin C Rose Oil ($74.00). The plastic leaves looked shiny and cheap next to the expensive glass dropper. It ruined the entire organic aesthetic. Now, I only use real botanicals. Last Friday, I went to Trader Joe’s and bought a fresh 1/2 pound bag of organic oranges for $3.49 and a $5.99 bouquet of real white roses. I sliced the oranges into thick 1/2 inch wheels. The smell of the sweet citrus oils filled my kitchen. I placed the fresh orange slices and real rose petals around the Biossance bottle. The natural textures of the real fruit and flower petals matched the natural ingredients in the oil perfectly. The camera captures the tiny pores on the orange peel and the soft velvet texture of the rose petals. You can’t fake that. You might also like: 15 Charming Tips For Clear Skin Natural Skincare for a Fresh New Look
6. Stack Your Products on Acrylic Risers

When you’re photographing multiple products together, you can’t just line them up like soldiers on a shelf. It looks incredibly boring and flat. You need to employ pedestals or acrylic risers to vary the heights and create a dynamic composition. I bought an Octagon Display Risers Set of 4 on Etsy for $22.50. They are made of solid, clear acrylic. I was trying to shoot a three-step routine from The Ordinary. I had a 1 oz bottle of Niacinamide 10% + Zinc 1% ($6.00), a 1 oz bottle of Hyaluronic Acid 2% + B5 ($8.90), and a 1 oz bottle of their peeling solution ($9.50). Sitting flat on the table, they looked cluttered and confusing. I placed the peeling solution on a 2-inch riser and the hyaluronic acid on a 1-inch riser. Here is the trick. You have to position the products on the risers at a 15-20 degree angle with the cap aligned parallel to the backdrop edge. This gives you optimal dimensionality without distorting the text on the labels. The clear acrylic risers almost disappear in the final photo, making the little glass bottles look like they are floating in mid-air. It’s a brilliant visual trick. You might also like: 15 Inspiring Aesthetic Skincare Products to Transform Your Space

6Pcs Jade Roller for Face
If you want something that just works, 6Pcs Jade Roller for Face is a safe bet (27 reviews, 4.5 stars).
7. Get Messy with Creative Smears and Swatches

Nobody just wants to see the outside of the bottle. People want to know what the product feels like before they spend money on it. You have to showcase the product textures with creative smears and swatches. I use a clean piece of glass from an old picture frame. I place the glass over a colored background. Last week, I took a 1/2 teaspoon dollop of First Aid Beauty Ultra Repair Cream ($38.00 for 8 oz). I used a small metal palette knife to smear the cream across the glass in a thick, swooping motion. The thick, whipped consistency of the cream held its shape perfectly. You could see the rich, dense texture. It looked incredibly satisfying. I bought a bottle of generic glass cleaner at Kroger for $3.29 to clean up between shots. You have to clean the glass perfectly every time. If there is a greasy smudge left behind from a previous swatch, the camera will pick it up. I’ve ruined an hour of shooting because I didn’t wipe the glass down properly. Smearing gels and thick creams takes practice, but it’s the best way to show exactly how a product will feel on the skin.
8. Play with Water Droplets and Glycerin Sprays

If you’re shooting a hydrating serum, a facial mist, or a gel moisturizer, you want it to look refreshing. Plain water evaporates way too fast under warm studio lights. I learned this the hard way. I was spraying plain tap water onto a 5 oz bottle of Mario Badescu Facial Spray with Aloe, Herbs and Rosewater ($12.00). By the time I got behind the camera and focused the lens, the water droplets had dried up or run down the side of the bottle, leaving weird streaks. I went to Whole Foods and bought a 4 oz bottle of pure vegetable glycerin for $6.99. I mixed a 50/50 solution of water and glycerin in a tiny spray bottle. I misted the Mario Badescu bottle with the mixture. The glycerin makes the water thick and sticky. The droplets stayed perfectly round and plump on the plastic bottle for over an hour. They caught the light beautifully and made the product look ice-cold and incredibly hydrating. It’s a cheap trick that professional product photographers use all the time. Just don’t spray it near your camera lens. The sticky mist is a nightmare to clean off expensive glass.
9. Color Coordinate Your Seamless Backgrounds
The background color makes or breaks the entire photo. I used to buy cheap, flimsy poster board. I bought a bright red poster board at Target for $1.29. I tried to shoot a green 1.7 oz jar of Glow Recipe Avocado Melt Retinol Eye Cream ($42.00) against it. The clashing colors were physically painful to look at. The red reflected onto the green glass and made it look muddy brown. It was an awful mistake. Now, I only use professional seamless paper backgrounds. I buy the Savage Widetone Seamless Background Paper. A 53-inch wide roll costs $34.00. I switched to a soft, pastel pink paper roll. The pale pink complemented the bright green jar perfectly. It created a soft, playful aesthetic that matched the Glow Recipe brand identity. The heavy paper rolls out perfectly smooth, so you don’t get any weird creases or bent corners in your background. When the paper gets dirty or stained from spilled serums, you just cut off the dirty part and roll out a fresh, clean section. It saves so much time in photo editing. Don’t cheap out on your background paper.

Yeamon Gua Sha Facial Tools and Face Roller Set
Yeamon Gua Sha Facial Tools and Face Roller Set punches above its price — 1 buyers rated it 4.5 stars. I would buy it again.
10. Incorporate Raw Ingredients for Visual Context
Showing the raw ingredients next to the finished product tells a visual story. It helps people understand what they’re putting on their face. I was photographing a 2.5 oz tube of KraveBeauty Oat So Simple Water Cream ($28.00). I wanted to emphasize the calming oat ingredient. I drove to Sprouts and bought bulk raw rolled oats for $1.99 a pound. I scattered exactly 1/4 cup of the raw oats on a beige surface around the tube of cream. I also added 2 tablespoons of raw honey dripping off a wooden dipper in the background. The dusty, earthy smell of the raw oats mixed with the sweet honey in my studio. The rough, dry texture of the oats provided a massive visual contrast to the smooth, sleek plastic of the KraveBeauty tube. It makes the photo much more engaging than just a plain white background. You have to be careful not to overdo it, though. I once buried a bottle of vitamin C serum in so many sliced lemons that you couldn’t even read the label. The props should support the product, not hide it completely.
11. Use Tweezers for Exact Prop Placement

When you’re dealing with macro photography and tiny props, your fingers are way too big and clumsy. I was trying to place individual roasted coffee beans around a 0.5 oz tube of The Inkey List Caffeine Eye Cream ($10.99). I bought the eye cream at Walmart that morning. Every time I tried to adjust a coffee bean with my fingers, I bumped the tube and knocked it over. I had to reset the entire shot five times. I was so frustrated. I finally went into my bathroom and grabbed my Tweezerman Slant Tweezers. They cost $24.00 and they are incredibly sharp. The sharp metal tweezers made a satisfying clicking sound as I picked up each individual coffee bean. I could place the beans exactly where I wanted them, down to the millimeter, without disturbing the eye cream tube. If you’re arranging tiny flower petals, seeds, or grains of sea salt for a scrub photo, you absolutely need a good pair of tweezers. It gives you absolute control over the composition. Just make sure you wash the tweezers before you use them to pluck your eyebrows again.
12. Clean Every Single Speck of Dust Before Shooting

This is the most tedious part of skincare aesthetic photography, but you can’t skip it. High-resolution macro lenses pick up absolutely everything. I spent three hours last month trying to edit out tiny white dust particles from a macro shot of a 1.7 oz jar of Clinique Moisture Surge 100H Auto-Replenishing Hydrator ($44.00). The glossy pink plastic cap attracts dust from the air like a literal magnet. It looked like the jar was covered in dandruff. It’s so much easier to clean the product before you press the shutter. I bought a Giottos Rocket Air Blaster for $16.99. It’s a rubber bulb that blasts a strong stream of air to blow off loose dust. I also bought a pack of thick microfiber cloths in the automotive aisle at Kroger for $5.99. Right before I take the photo, I blast the product with air and give it a final, gentle wipe with the microfiber cloth. I even wear cheap cotton gloves when handling the jars so I don’t leave oily fingerprints on the glass. Trust me, spending two minutes cleaning the jar will save you two hours of clicking the spot healing brush in Photoshop. No exaggeration.
I’ve learned all of these tricks through trial and error, and a lot of ruined products. But honestly, once you get the lighting and the textures right, taking these photos is incredibly fun. I personally swear by that water and glycerin trick. It completely changed how my hydrating serums look on camera. Start small. Grab some fresh fruit from Trader Joe’s, find a nice north-facing window, and practice smearing your favorite moisturizer on a clean piece of glass. You’ll be amazed at how quickly your photos improve. Pin this guide so you have all the specific measurements and setups ready for your next content shoot! You won’t regret having these notes handy when you’re setting up.
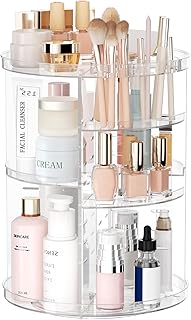
Rotating Makeup Organizer
Honestly, Rotating Makeup Organizer surprised me — sturdier than it looks in the photos, and over 47 buyers gave it 4.5 stars.
Frequently Asked Questions
What is the best lens for skincare aesthetic photography?
A dedicated macro lens is essential for capturing product textures. The Canon EF 100mm f/2.8L Macro or the Laowa 60mm f/2.8 2x Ultra Macro Lens are excellent choices for showing microscopic details like water droplets and cream consistency.
How do I make water droplets stay on skincare bottles?
Mix a 50/50 solution of plain water and pure vegetable glycerin in a spray bottle. The glycerin thickens the water, allowing the droplets to stay perfectly round and plump on the packaging without evaporating under hot studio lights.
Should I use a ring light for product photography?
No. Ring lights leave harsh, bright white circular reflections on glossy glass bottles and plastic packaging. Instead, use a softbox with a diffuser panel positioned at a 45-degree angle to create soft, flattering light with natural shadows.
How do I make inexpensive skincare look luxurious on camera?
Use reflective surfaces like mirror acrylic or glossy black acrylic sheets as your base. Combine this with clear acrylic risers to vary the height of the products, and incorporate fresh botanical props like real citrus slices or rose petals.