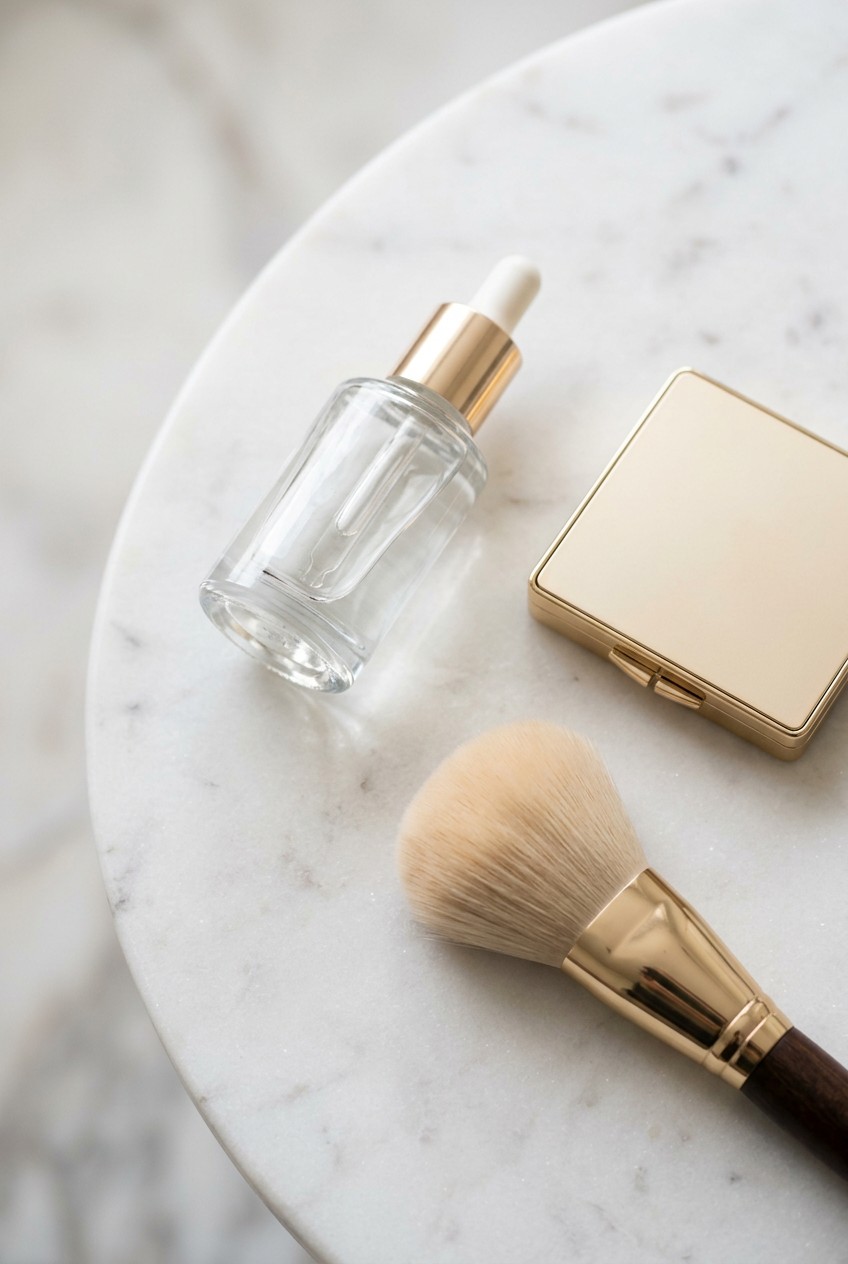
What’s Inside
- Master Real-Skin Beauty With Hydration And SPF
- Upgrade Your Makeup And Skincare With Next-Gen Sunscreens
- Try Regenerative PDRN For Better Makeup And Skincare Prep
- Stop Using Too Much Product On Your Face
- Protect Your Barrier With Ectoin And Postbiotics
- Fix Clown Blush With This Concealer Trick
- Ditch The Powders For Cream Base Products
- Always Use A Damp Sponge For Foundation
- Let Your Concealer Self-Set Before Blending
- Stop Dragging Your Brushes Across Your Face
- Place Your Dewy Glow Exactly Where You Want It
Last Tuesday at Whole Foods, I caught my reflection in the freezer aisle glass and audibly gasped. I was staring at a total disaster. My makeup and skincare routine had completely failed me. Foundation was flaking off in dry, orange patches around my nose. It proved once again that bad prep ruins everything. I tried this wrong for months before figuring it out. Slapping thick creams over dry skin won’t fix texture issues. It just creates a slippery mess. You end up looking like a melting candle by noon. I’m writing this because I’m tired of seeing terrible advice online. People tell you to buy a $100 serum and hope for the best. That’s garbage. Real results come from knowing exactly how much product to use. It’s about the textures. The wait times. The specific techniques that actually make a difference on your face. Let’s get into the exact steps I’m using now.
1. Master Real-Skin Beauty With Hydration And SPF

The internet’s finally moving past the greasy glass skin look. I’m so relieved. Having a face so shiny it blinds people isn’t practical. The new focus is real-skin beauty. This means your face looks like actual human skin, just really healthy and hydrated. To get this, you need strategic hydration. I personally swear by The Ordinary Hyaluronic Acid 2% + B5 Hydrating Serum with Ceramides. It’s exactly $9.90 for a 30ml bottle at Target. Most people get this wrong. I used to rub a full dropper onto a bone-dry face. My skin felt tight and sticky like dried syrup. You have to apply a dime-sized amount to damp skin. I mist my face with exactly 2 tablespoons of water from a spray bottle first. Then I pat the serum in. It absorbs instantly. Next, you need protection. I use a nickel-sized dollop of CeraVe AM Facial Moisturizing Lotion with SPF 30. It’s $19.99 for a 3 oz tube. It smells faintly like sunscreen but fades fast. If you’re feeling incredibly rich, the Natura Bissé Diamond Cocoon Sheer Cream is over $200 for 1.7 oz. Honestly, the CeraVe works just fine. You need at least SPF 30 every single day. Yes, even indoors. UV rays blast right through your living room windows while you’re watching Netflix. I’m a big believer in rich, lipid-heavy creams. Skip the fat-free stuff. It tastes like wet cardboard. Okay, you aren’t eating it, but fat-free skincare feels just as useless on your face. Trust me on this.
2. Upgrade Your Makeup And Skincare With Next-Gen Sunscreens

Sunscreen technology is getting wild. If you’re still using thick, white pastes that smell like coconuts and regret, you’re missing out. The newest filters are incredible. Bemotrizinol is the ingredient you want to look for. It gives amazing broad-spectrum protection without the heavy, suffocating feel. Upgrading your makeup and skincare prep starts with a modern SPF. I was shopping at Sprouts last month, looking at their natural sunscreens. Most of them are so thick you need a chisel to spread them. I gave up and bought the Ultra Violette Preen Screen SPF 50 Facial Sunscreen Mist With Niacinamide online. It’s $40.50 for a 75ml bottle. It sprays out in a super fine mist. It feels like a cool breeze on your face. You don’t have to aggressively rub it in. The golden rule for sunscreen is volume. You absolutely must use exactly 1/2 teaspoon of product for your face and neck. I literally measured this with my kitchen baking spoons once. It’s way more than you think. Squirting a tiny dot won’t do anything. Apply it generously. Let it sit for a full three minutes before touching your face again. It creates a perfect, slightly tacky base for your foundation to grip onto. I’ve ruined so many shirts trying to pull them over a wet, sunscreen-covered face. Give it time to dry down. Your skin will look plump. Your foundation won’t slide off your nose by 2 PM.
3. Try Regenerative PDRN For Better Makeup And Skincare Prep

We need to talk about salmon DNA. I know it sounds absolutely disgusting. I thought the exact same thing when I first heard about it. But PDRN (Polydeoxyribonucleotide) is the biggest ingredient trend right now. It’s derived from salmon DNA and it forces your cells to repair themselves. It builds collagen and elastin like crazy. Good makeup and skincare routines always start with cellular health. I used to buy cheap snail mucin at Walmart and it just sat on top of my skin doing nothing. Now I use The INKEY List Exosome Hydro-Glow Complex Serum. It’s only $19.99 for a 30ml bottle. You only need exactly 4 drops for your entire face. The texture is slightly viscous. It feels a bit like raw egg whites but it doesn’t smell fishy at all. It actually has no scent. You pat it in, and your skin immediately drinks it up. It leaves this bouncy, firm texture behind. I tried this wrong for months before figuring it out. I was mixing it with heavy vitamin C creams and it caused a horrible chemical reaction. My face turned bright red. Now I use it alone on clean skin. I wait exactly 60 seconds. Then I apply my moisturizer. The difference in my skin’s firmness is undeniable. When your skin is actually firm and repaired, foundation glides on effortlessly. You don’t have to fill in massive pores with silicone primers anymore. You might also like: 15 Creative Aesthetic Rhode Skincare to Transform Your Space

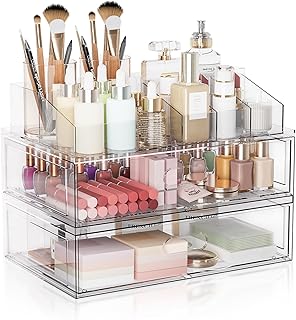
Vtopmart 3 Tier Clear Makeup Organizer with Drawer
Vtopmart 3 Tier Clear Makeup Organizer with Drawer has been one of the most consistently praised picks in this category. 19 reviewers averaged 4.5/5.
4. Stop Using Too Much Product On Your Face

This is my biggest pet peeve. People think slathering on a thick layer of expensive serum will make it work faster. It won’t. Your skin can only absorb so much. The rest just sits there, clogs your pores, and ruins your base. I learned that the hard way. Last year, I bought a giant 16 oz tub of heavy retinol cream at Costco for $39.99. I scooped out a massive glob, about 2 tablespoons worth, and rubbed it all over my face. The next morning, my skin was peeling off in sheets. It was agonizing. It felt like a terrible sunburn. For potent actives like retinoids, you only need a pea-sized amount. That’s it. A literal green pea. For liquid serums, 2 to 3 drops is the maximum. Any more than that and you’re just wasting money. When you use too much product, it pills. Have you ever tried to rub foundation over a thick layer of serum? It rolls up into little balls that look like pencil eraser shavings. It’s repulsive. You have to wash your whole face and start over. Less is always more. Apply a tiny amount. Press it firmly into your skin with the palms of your hands. The warmth of your hands helps it melt in. If your skin still feels tight after five minutes, you can add exactly 1 more drop. Stop suffocating your pores. You might also like: 20 Charming Aesthetic Videos Night Routine Skincare You’ll Want to Bookmark
5. Protect Your Barrier With Ectoin And Postbiotics

Barrier health is everything. If your skin barrier is broken, nothing will look good. Your face will be red, stinging, and textured. Ectoin is the ingredient you need. It’s an amino acid derivative that acts like a tiny shield for your skin cells. It locks in moisture and blocks out pollution. Postbiotics are also incredible for balancing your skin’s microbiome. I use the Dr. Jart+ Ceramidin Ectoin-Infused Cream. It costs $65.00 for a 50ml tube at Sephora. I know that’s pricey. But I was buying four different $15 creams at Target every month trying to fix my dry patches. It’s a waste. The Dr. Jart+ cream is thick. It has the consistency of soft butter. You scrape out exactly 1/4 teaspoon and warm it between your fingers. It smells very faintly of oats. When you press it onto a damaged barrier, the relief is instant. The stinging stops immediately. I ruined my barrier last winter by over-exfoliating with harsh acids. Every single foundation I owned looked crusty and dry. Once I started using ectoin, my skin smoothed out within three days. It creates this beautiful, plump surface. Makeup glides over it perfectly. Don’t ignore your skin’s natural defenses. If your face burns when you apply a basic moisturizer, your barrier is crying for help. Stop the harsh scrubs. Switch to ectoin and let your face heal. You might also like: 15 Gorgeous Aesthetic Glass Skin That Changed Everything
6. Fix Clown Blush With This Concealer Trick

We’ve all done it. You’re getting ready in bad lighting, and suddenly you look like a clown. You applied way too much liquid blush. Your cheeks are screaming hot pink. I used to panic. I’d grab a makeup wipe from Kroger, scrub my cheek aggressively, and leave a raw, red welt. Then I’d have to reapply my foundation over the wet, irritated patch. It looked terrible. I finally learned the right way to fix this. Don’t reach for a wipe. Instead, grab your concealer. I absolutely love the TOO FACED Born This Way Multi-Use Sculpting Concealer. It’s $35.00 for a 0.5 oz bottle. Put exactly 2 drops of concealer onto the back of your hand. Take a clean, fluffy brush and dip it lightly into the concealer. Gently blend it directly over the harsh blush edges using tiny circular motions. The concealer acts like an eraser, but it doesn’t lift your base makeup. It just diffuses the bright pink pigment down to a soft, manageable flush. It mixes with the blush to create a custom, muted shade. It’s brilliant. I do this all the time now. It saves me from having to wash my entire face when I get heavy-handed. Always blend on the back of your hand first. If you put the concealer directly onto your cheek, you’ll just create a muddy, beige blob.
Clear Stackable Makeup Organizer with Drawer
Honestly, Clear Stackable Makeup Organizer with Drawer surprised me — sturdier than it looks in the photos, and over 302 buyers gave it 4.5 stars.
7. Ditch The Powders For Cream Base Products

Powder products are ruining your makeup. Unless you have extremely oily skin, packing powder onto your face just ages you. It settles into every single fine line. It makes your skin look like a dry riverbed. Creams are vastly superior. They melt into the skin and look like natural flush and shadow. I threw out almost all my powder blushes last year. Now I use the MAKEUP BY MARIO Soft Pop Blush Stick in Earthy Pink. It’s $32.00 for a 0.37 oz stick. The texture is incredibly creamy. It glides on without tugging. I swipe exactly 1 inch of product onto the back of your hand, pick it up with a brush, and stamp it onto my cheeks. It gives a gorgeous, healthy finish. If you must use powder to set your makeup, use it strategically. Try the no-bake baking technique. Take a velour puff and dip it into loose powder. Tap the excess off on your wrist. Press the puff firmly under your eyes, and then immediately dust it away with a clean brush. Don’t let it sit there and bake. Baking pulls all the moisture out of your skin. It leaves you looking incredibly dry. Creams are forgiving. If you mess up, you can blend them out. Powders just grip onto dry patches and refuse to let go. Make the switch to creams. You won’t regret it.
8. Always Use A Damp Sponge For Foundation

Applying foundation with a dry sponge is a rookie mistake. I see people doing this on airplanes and it physically pains me. A dry sponge is basically a rock. When you hit your face with it, it sounds like a hollow thud. It absorbs half your expensive foundation and leaves a streaky, uneven mess on your skin. You absolutely must dampen it. I use the Original Beautyblender. It’s $20.00 for 1 sponge. Yes, there are cheaper knockoffs, but the foam density on the original is perfect. Take your sponge to the sink. Run it under warm water and squeeze it exactly 5 times. It will double in size. Now, here is the crucial step most people skip. Squeeze it out thoroughly, then wrap it in a clean towel and squeeze it one more time. You want to extract exactly 1/4 cup of excess water. The sponge should feel cool and slightly damp, not wet. If it’s dripping, it will water down your foundation and ruin the coverage. When you bounce a perfectly damp sponge over your skin, it presses the product in flawlessly. It mimics the texture of real skin. I used to use a dry wedge sponge from Walmart and wonder why my makeup looked cakey. It’s because the dry foam was dragging the pigment around instead of stamping it in. Wet your sponge. It changes everything.
9. Let Your Concealer Self-Set Before Blending

This trick completely altered my routine. If you apply liquid concealer and immediately start blending it out, you’re blending away all the coverage. You end up using twice as much product to hide your dark circles. The secret is letting it self-set. I use the NARS Radiant Creamy Concealer. It’s $32.00 for a 0.22 oz tube. I apply exactly 3 small dots under my inner eye corner and 1 dot at the outer edge. Then, I take my hands off my face. I wait exactly 15 seconds. I usually use this time to brush through my eyebrows. During these 15 seconds, the water and alcohol in the concealer begin to evaporate. The pigment becomes concentrated. The texture gets slightly tacky. When you finally blend it out with your damp sponge, the coverage is intense. It stays exactly where you put it instead of sliding down your cheek. I tried this wrong for months before figuring it out. I used to swipe concealer on and frantically rub it in with my finger. It creased within ten minutes. By letting it self-set, it grips the skin. It locks into place. You don’t even need as much setting powder. Just be careful not to wait too long. If you wait a full minute, it will dry like cement and you won’t be able to move it at all. 15 seconds is the sweet spot.

Masirs Clear Makeup Organizer
A dependable everyday pick — Masirs Clear Makeup Organizer – 16-Compartment Cosmetic and Jewelry Ho pulls in 258 ratings at 4.5 stars. Not flashy, just solid.
10. Stop Dragging Your Brushes Across Your Face

The way you hold your brush matters just as much as the product on it. If you apply cream contour or foundation and drag the brush aggressively across your cheek, you’re doing it wrong. Dragging literally wipes the product off your face. It leaves harsh, visible brush strokes. It also micro-exfoliates your skin, which lifts up dead skin flakes and makes your makeup look crusty. You need to use soft dabbing or stippling motions. I love the Real Techniques Expert Face Brush. It’s only $9.99 for 1 brush at Ulta. The bristles are dense and synthetic. When I apply my cream bronzer, I press the brush into the skin and lift it straight up. Press and lift. I repeat this exactly 20 times moving up my cheekbone. It takes a little longer than swiping, but the result is completely smooth. The pigment gets deposited evenly into the skin instead of being pushed around. I used to drag my foundation brush across my forehead. I always wondered why my foundation looked streaky and my skin looked inflamed. The harsh dragging was ruining my barrier and moving my sunscreen underneath. Dabbing is gentle. It preserves the layers of skincare you just carefully applied. Treat your face delicately. Stop scrubbing your makeup on like you’re trying to clean a dirty frying pan.
11. Place Your Dewy Glow Exactly Where You Want It

Dewy skin is great, but there’s a fine line between glowing and looking sweaty. Slathering a liquid highlighter all over your face is a terrible idea. I did this once before running errands. I caught my reflection at Trader Joe’s while standing in the produce section. Under those fluorescent lights, I looked like a glazed donut left in a hot car. I was practically dripping. It wasn’t cute. You need to place your glow strategically to add dimension. I use the Charlotte Tilbury Hollywood Flawless Filter. It’s $49.00 for a 1 oz bottle. It’s expensive, but it lasts forever. I don’t use it as a primer all over my face anymore. Instead, I take the doe-foot applicator and swipe exactly 1/2 inch of product onto the high points of my cheekbones. I add 1 tiny dot to the bridge of my nose and 1 dot on my Cupid’s bow. I tap it in with my ring finger. It leaves a gorgeous, pearl-like finish without making my forehead or chin look greasy. If you have any texture or large pores, keep highlighter far away from those areas. Shimmer acts like a magnifying glass for pores. Keep the center of your face relatively matte. Let the high points catch the light. This gives you that polished, fresh look without looking like you just ran a marathon.
Honestly, finding the right balance takes some trial and error. But once you stop slapping on too much product and start respecting your skin’s barrier, everything changes. I highly recommend picking up that Dr. Jart+ Ectoin cream if you’re struggling with dry patches. It saved my face. Pin this guide so you can check the wait times and measurements next time you’re doing your routine. Your skin will thank you.
Frequently Asked Questions
How long should I wait between makeup and skincare layers?
You should wait exactly 60 seconds after applying serums, and a full three minutes after applying sunscreen before moving on to your foundation. This prevents pilling and sliding.
Can I mix my makeup and skincare products together?
I don’t recommend mixing them directly in the bottle. However, you can mix two drops of foundation into your liquid blush on the back of your hand to sheer out the pigment.
Why does my makeup and skincare pill off my face?
Pilling happens when you apply too much product or don’t let the layers dry. Use a pea-sized amount for thick creams and limit liquid serums to three drops maximum.
Do I really need to use a damp sponge for foundation?
Yes. A dry sponge absorbs your expensive foundation and drags it across your skin. A damp sponge presses the product flawlessly into your makeup and skincare base.