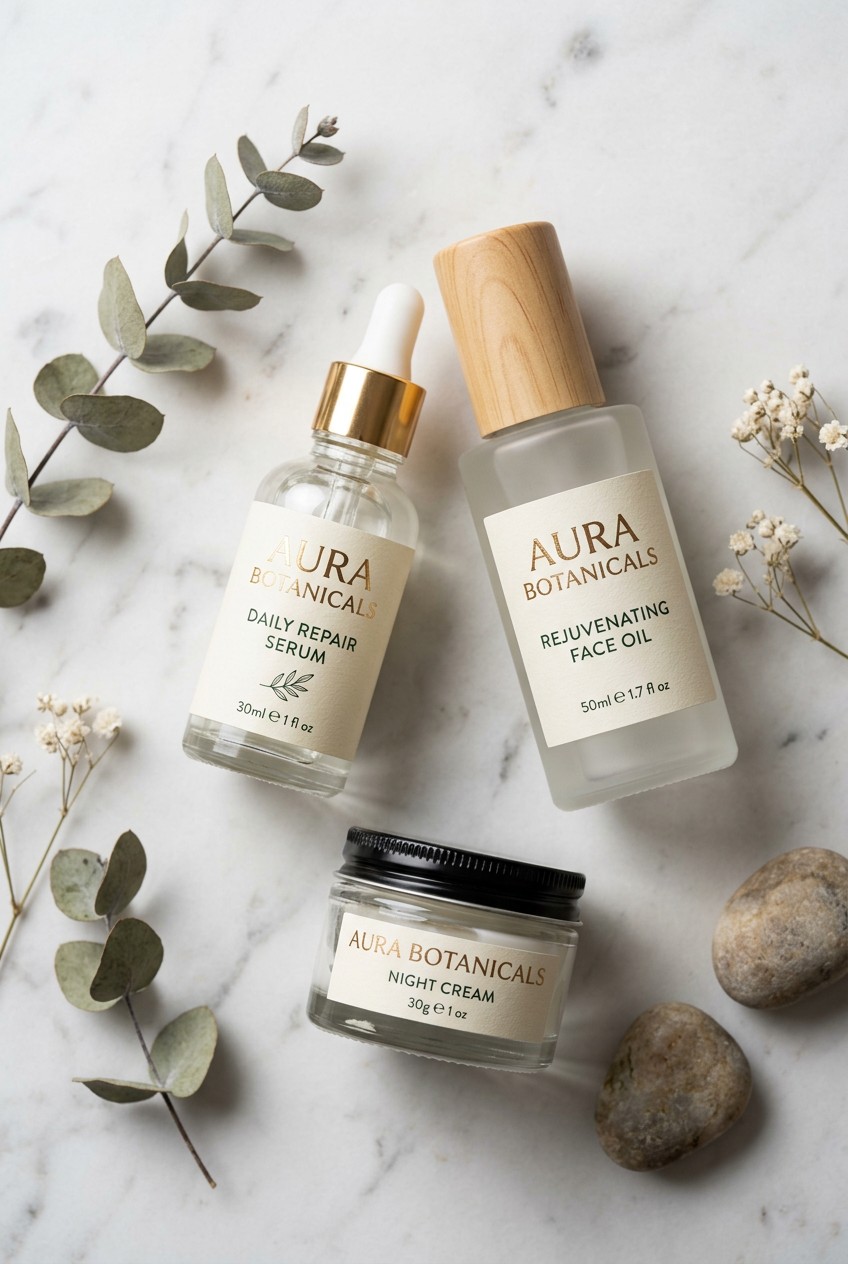
What’s Inside
- Embrace Hyper-Realistic Macro Shots (My Top Skincare Product Photography Ideas)
- Highlight Key Ingredients with Fresh Props
- Showcase Application with a Hand Model
- Master Diffused Lighting to Eliminate Harsh Shadows
- Adopt a Minimalist Composition with Neutral Backdrops
- Create Artistic Texture Swatches with Palette Knives
- Incorporate Lifestyle Elements for Context
- Utilize Strategic Shadows for Depth and Mood
- Maintain Brand Consistency Across All Visuals
- Meticulously Clean Products Before Every Single Shot
- Design Engaging Flat Lays with the Rule of Odds
- Experiment with Low Angles for a Prestige Feel
- Incorporate Water Effects to Emphasize Hydration
- Leverage Neurocosmetics Trends with Serene Settings
Last Tuesday at my kitchen table, I was crying over a blurry, yellow-tinted photo of my favorite moisturizer. I’ve spent hours trying to figure out these skincare product photography ideas. Most of my early attempts looked like hostage photos. My kitchen overhead lights made everything look greasy and sad. The shadows were harsh, the colors were muddy, and the beautiful frosted glass bottle looked like cheap plastic. It’s frustrating when you know a cream feels like heaven, but the picture makes it look like separated mayonnaise. I tried this wrong for months before figuring it out. I wasted so much time and money on props that just cluttered the frame. But after a lot of trial and error, I finally cracked the code on making beauty products look expensive and irresistible. Let’s fix your lighting and composition tonight.
1. Embrace Hyper-Realistic Macro Shots (My Top Skincare Product Photography Ideas)

You can’t fake good texture. I’m obsessed with hyper-realistic macro shots because they show the actual consistency of a formula. It’s a massive trend for 2026. Last month, I tried taking a close-up of my COSRX Advanced Snail 96 Mucin Power Essence ($25.00, 3.38 oz) with just my phone camera. Huge mistake. The autofocus kept blurring the stringy, gooey droplet. It made the essence look like a weird smudge on the glass. I finally rented a 90mm prime macro lens. They run about $500 if you’re buying one new. It changed everything. You need to see the exact thickness of the liquid. I set up my tripod and squeezed out exactly 1/2 teaspoon of the essence onto a clear acrylic block. Using focus stacking, I combined three different images to get every tiny bubble razor-sharp. If you’re shooting the thick base of CeraVe Moisturizing Cream ($17.99, 16 oz), a macro lens catches those tiny peaks and valleys in the lotion. Skip the fat-free stuff when it comes to lighting macro shots. You want a bright beam hitting the texture so it doesn’t look flat. Make them feel the texture. Trust me on this.
2. Highlight Key Ingredients with Fresh Props

I’m a firm believer that raw ingredients sell the product faster than the packaging does. When you’re brainstorming new setups, always think about what’s actually inside the bottle. Last Friday, I was wandering through Whole Foods and grabbed a bundle of fresh calendula flowers for $4.99. I wanted to shoot my Kiehl’s Calendula Herbal-Extract Toner ($47.00, 8.4 oz) and needed the real petals to match the ones floating inside the plastic bottle. I scattered exactly 1/4 cup of the dried and fresh petals around the base of the toner. It looked incredible. Honestly, I’ve messed this up before. I once tried shooting The Ordinary Niacinamide 10% + Zinc 1% ($6.00, 1 oz) with an old, bruised lemon I found in the back of my fridge. The brown spots on the lemon rind made the whole serum look expired and gross. Always buy the freshest props you can find. Slice up a perfectly ripe lemon into 1/4-inch thick wheels and pair it with some crushed white zinc supplements. It instantly communicates transparency. Fresh ingredients give them that visual proof immediately.
3. Showcase Application with a Hand Model

You won’t sell a product if people can’t imagine putting it on their own skin. Showing the product in action is mandatory. I personally swear by hiring a hand model, or at least roping in a friend who has great cuticles. I tried using my own hands last winter to swatch La Roche-Posay Cicaplast Balm B5 ($15.99, 1.35 oz). It was a total disaster. My knuckles were red and cracked from the cold. The thick white paste just emphasized how dry my skin was. Not a great look for a healing ointment. Now, I make sure whoever is modeling gets a fresh, neutral manicure first. Have them squeeze exactly a pea-sized amount onto their index fingertip. The goal is to show how the balm melts into the skin. When you’re directing the shot, make sure their hand looks relaxed. Stiff, claw-like fingers are a dead giveaway of an amateur shoot. I’ve learned to have the model gently rest their hand on a soft surface while applying the product. It makes the whole scene feel intimate and completely relatable.

EQQUALBERRY Vitamin Illuminating Serum | Niacinamide 4% +
Honestly, EQQUALBERRY Vitamin Illuminating Serum | Niacinamide 4% + Brightening surprised me — sturdier than it looks in the photos, and over 101 buyers gave it 4.5 stars.
4. Master Diffused Lighting to Eliminate Harsh Shadows

Most people get this wrong right out of the gate. Harsh lighting is the absolute enemy of skincare photography. I’m not kidding. If you blast a bright ring light directly at a glossy plastic bottle, you’re going to get a massive, ugly white glare that hides the label. I used to do this with my CeraVe Hydrating Facial Cleanser ($14.99, 12 oz). The reflection was so bad you couldn’t even read the logo. You absolutely must diffuse your light. I picked up a basic softbox kit online for $120, and it was worth every penny. If you’re on a strict budget, I’ve got a cheap trick. I went to Target last week and bought a roll of standard parchment paper for $3.99. I taped a 2-foot sheet of it right over my north-facing window to filter the afternoon sun. It instantly softened the light and wrapped beautifully around the cylindrical bottles. No blinding hot spots. Just a smooth glow that makes the product look expensive. It’s such a simple fix, but it completely alters the mood of the photo. You might also like: 20 Lovely Aesthetic Night Routine Skincare for a Fresh New Look
5. Adopt a Minimalist Composition with Neutral Backdrops

Clutter kills the vibe. The minimalist trend is going to dominate straight through 2026, and for good reason. You want the product to be the undeniable hero of the shot. I used to surround my jars with fake pearls, silk ribbons, and scattered glitter. Looking back, it was incredibly tacky. The background distracted from the actual skincare. Now, I keep it painfully simple. I bought a 12×12 inch faux marble slab from Walmart for $18.50. It’s my absolute favorite backdrop. When I shot the Drunk Elephant Protini Polypeptide Cream ($68.00, 1.69 oz) last weekend, I placed the bright green and white jar right in the center of that clean marble. Nothing else. The contrast against the gray-veined stone was striking. You don’t need a million props to make a photo interesting. Sometimes, a pristine white vinyl backdrop is all you need. You can get a 3-foot roll for about $25. It forces the viewer’s eye exactly where you want it. It’s clean, it’s clinical, and it builds immediate trust in the formula. You might also like: 20 Gorgeous Aesthetic Products Korean Skincare for Every Budget
6. Create Artistic Texture Swatches with Palette Knives

I’m completely obsessed with playing with product textures. It’s like finger painting for adults. If you’re shooting a thick moisturizer, don’t just leave it sitting flat in the jar. You’ve got to scoop it out and show off its peaks. I bought a set of metal palette knives from a craft store for $12.99 specifically for this. Last Tuesday, I took my Tatcha The Dewy Skin Cream ($72.00, 1.7 oz) and scooped out exactly 1 tablespoon of the purple cream. I smeared it across a clean glass plate. I used the edge of the knife to create elegant, sweeping swirls. It looked like thick frosting. The way the studio light caught the ridges of the cream made it look incredibly rich and hydrating. I’ve also done this with facial oils. I used a glass dropper to place five perfect, spherical droplets of Sunday Riley Luna Sleeping Night Oil ($55.00, 0.5 oz) onto a piece of waterproof cardstock. Just be warned, this gets messy fast. Have a damp microfiber cloth ready. Once the product starts melting under the lights, you’ve only got about three minutes to get the shot. You might also like: 20 Brilliant Aesthetic Pink Skincare You Can Try Today

Yeamon Gua Sha Facial Tools and Face Roller Set
Honestly, Yeamon Gua Sha Facial Tools and Face Roller Set surprised me — sturdier than it looks in the photos, and over 1 buyers gave it 4.5 stars.
7. Incorporate Lifestyle Elements for Context

People aren’t just buying a serum. They’re buying the fantasy of having their life completely together. You’ve got to sell that feeling. I love adding lifestyle elements to give the product some context. A few days ago, I set up a shot for my Glow Recipe Watermelon Glow Niacinamide Dew Drops ($35.00, 1.35 oz). Instead of a plain background, I staged my nightstand. I laid out a pure silk pillowcase and brewed a cup of chamomile tea using tea bags I grabbed from Trader Joe’s for $3.49. I placed the pink glass bottle right next to the steaming mug. It instantly evoked this relaxing, aspirational evening routine. I’ll admit a stupid mistake I made here once. I tried to do a morning routine shoot and left a half-eaten piece of toast in the background. It didn’t look candid at all. It just looked gross and messy. Keep the lifestyle props clean and intentional. These small details help the customer visualize the product sitting on their own bathroom counter.
8. Utilize Strategic Shadows for Depth and Mood

I know I just told you to diffuse your light, but sometimes you’ve got to break the rules. While soft light is great for creamy textures, hard light and dark shadows can make glass bottles look incredibly high-end. It’s a surprising trick that I didn’t appreciate until recently. I was shooting a bottle of Paula’s Choice 2% BHA Liquid Exfoliant ($34.00, 4 oz) in the late afternoon. The sun was blasting directly through my window. It cast this long, sharp shadow of the grey plastic bottle across my desk. Instead of blocking the light, I leaned into it. The harsh shadow added so much depth and mood to the photo. It looked architectural and edgy. A hard light source will project the color of transparent glass into the shadow. I take a small, focused LED light (you can find them for around $45) and angle it at 45 degrees to cast a dramatic shadow. Just make sure the shadow isn’t falling across the product’s label. You still need the text to be perfectly readable.
9. Maintain Brand Consistency Across All Visuals

If your Instagram grid looks like a chaotic collage of random colors, you’re doing it wrong. Brand consistency is everything. You can’t shoot a dark, moody shadow picture one day and a bright, pastel floral flat lay the next. It confuses people. I learned this the hard way when I was building my own portfolio. I threw every style together, and it looked like a messy garage sale. Now, I stick to a very specific color palette. Take a brand like Wishful Skin. Their Yo Glow AHA & BHA Facial Enzyme Scrub ($39.00, 3.38 oz) comes in this soft, pastel yellow tube. When I shoot it, I make sure the background, the props, and even the lighting gels match that soft, playful aesthetic. I use a pale lemon-colored paper backdrop (about $15 for a roll) to keep the vibe cohesive. If you’re shooting an apothecary-style brand with dark amber glass, stick to earthy tones, wood textures, and warm lighting. Decide your brand’s personality and refuse to deviate from it.

Eclat Skincare Vitamin C Serum – Skin Care for Dark Spots
Eclat Skincare Vitamin C Serum – Skin Care for Dark Spots punches above its price — 753 buyers rated it 4.5 stars. I would buy it again.
10. Meticulously Clean Products Before Every Single Shot

This is the most tedious, annoying part of the job, but you absolutely can’t skip it. The camera sees everything. A tiny speck of dust that you can’t even see with your naked eye will look like a boulder in a macro shot. I once spent three hours trying to Photoshop fingerprints off the shiny gold cap of an Estée Lauder Advanced Night Repair Serum ($115.00, 1.7 oz). It was a nightmare. The photo still looked slightly warped from my bad editing. Never again. Now, I keep a stack of clean microfiber cloths and a small bottle of rubbing alcohol right next to my tripod. Before I click the shutter, I wipe down the entire bottle. I even wear cheap cotton gloves (a pack of 10 is like $8 at the drugstore) when I’m placing the product on the set so I don’t leave new smudges. Pay special attention to the rim of jars. If there’s dried crusty cream around the threads of the lid, it looks completely unsanitary. It takes two minutes and saves you hours of frustration later.
11. Design Engaging Flat Lays with the Rule of Odds

Flat lays aren’t dead, but boring flat lays definitely are. The secret to making them look professional is the rule of odds. I don’t know the exact psychology behind it, but grouping items in threes or fives just looks better to the human eye. I tried shooting two tubes of Summer Fridays Lip Butter Balm ($24.00, 0.5 oz) side by side. It just looked stiff and awkward. Like they were standing at attention. The moment I added a third tube in a different shade, the whole composition relaxed. I arranged the three tubes diagonally on a textured linen cloth. To add some dimension, I ran to Sprouts and bought a small, shallow ceramic dish for $6.99. I placed one of the balms inside the dish and the other two resting on the edge. Layering is crucial. Don’t just lay everything flat on the ground. Stack small acrylic blocks under the products to raise them up. It creates natural shadows and makes the flat lay feel dynamic.
12. Experiment with Low Angles for a Prestige Feel

If you want a product to look expensive, shoot it from below. It’s a classic trick that instantly adds a sense of luxury and authority. When you look up at something, it feels important. I tried this with a tiny bottle of Sunday Riley Luna Sleeping Night Oil ($55.00, 0.5 oz). Normally, I’d shoot it straight on. Because the bottle is so small, it easily gets lost in the frame. I lowered my tripod so the lens was actually resting on the table, pointing slightly upward at the bottle. I’m telling you, it made that half-ounce bottle look like a towering monument. It emphasized the heavy glass base and made the silver dropper cap look incredibly sleek. This angle works perfectly for high-end skincare because it commands respect. You’re visually telling the customer that this product is top-tier. I usually drape a large piece of seamless paper down the wall and across the table so there’s no distracting horizon line cutting through the back of the bottle.

COSRX Vitamin E Vitalizing Sunscreen
If you want something that just works, COSRX Vitamin E Vitalizing Sunscreen is a safe bet (42 reviews, 4.5 stars).
13. Incorporate Water Effects to Emphasize Hydration

If a product claims to be hydrating, you need to show water. It’s that simple. Visually connecting the moisturizer to actual moisture makes the marketing claim believable. I love using condensation and water droplets for this. Last summer, I was shooting the Laneige Water Sleeping Mask ($32.00, 2.3 oz) and wanted it to look refreshingly cold. I took a small spray bottle (you can get them at any dollar store for $1.25). I mixed exactly 1/2 cup of water with 1 tablespoon of vegetable glycerin, and misted the blue plastic jar. The glycerin makes the water droplets stick to the surface without instantly rolling off or evaporating under the hot studio lights. The jar looked like it was sweating in the best way possible. I’ve also tried doing actual water splashes, but honestly, it’s a huge mess. I ruined a good backdrop trying to drop a bottle into a bowl of water. Otherwise, stick to the glycerin spray. It’s much safer.
14. Leverage Neurocosmetics Trends with Serene Settings

Skincare isn’t just about clear pores anymore. It’s about mental health. The neurocosmetics trend is exploding for 2026. Products are being formulated specifically to lower cortisol and reduce stress. Your photography needs to reflect that calm energy. I was working with the REN Clean Skincare & Now To Sleep Pillow Spray ($25.00, 2.5 oz) recently. Instead of a bright, clinical bathroom setup, I wanted the photo to feel like a deep exhale. I went to Kroger and bought a $9.99 bouquet of fresh lavender and eucalyptus. I set up my shot in the late evening using only the soft, ambient light from a bedside lamp. I scattered exactly 3 sprigs of lavender around the frosted glass bottle on top of a rumpled linen sheet. I intentionally kept the focus slightly soft on the edges to make the image feel dreamy and relaxed. Use muted, cool-toned backgrounds and avoid harsh, aggressive lighting at all costs. The goal is to make the skincare routine look like a much-needed mental escape.
You don’t need a massive studio to pull off these skincare product photography ideas. You just need a little patience, a clean microfiber cloth, and a willingness to get messy with some palette knives. I’ve ruined plenty of backdrops and wasted hours on bad lighting, but once you nail that perfect, creamy texture shot, it’s incredibly satisfying. I’m telling you, skip the basic flat lays and try the water droplet trick or the macro lens this weekend. Pin this page so you don’t forget these setups next time you’re stuck staring at a blank backdrop. Your Instagram grid will thank you.
Frequently Asked Questions
What is the best lens for skincare product photography?
I highly recommend a 90mm or 105mm prime macro lens. It’s essential for capturing the hyper-realistic textures of thick creams and gooey serums. You can’t get that level of razor-sharp detail with a standard phone camera lens.
How do you avoid bad reflections on glossy skincare bottles?
You absolutely must diffuse your lighting. I tape a sheet of cheap parchment paper over my window to soften the harsh sunlight. It completely eliminates those blinding white glares and creates a smooth, expensive-looking glow across the plastic packaging.
Why do my skincare flat lays look boring?
You’re probably ignoring the rule of odds and keeping everything too flat. Try grouping your products in threes or fives. Stack small acrylic blocks under the jars to raise them up at different heights. This creates natural shadows and instant visual interest.
How do I make a moisturizer look hydrating in photos?
I love using a simple water and vegetable glycerin mixture. Mix half a cup of water with one tablespoon of glycerin in a spray bottle and mist the product. The glycerin makes the droplets stick perfectly, making the jar look refreshingly cold and incredibly hydrating.
