What’s Inside
- Master Soft Natural Light for Aesthetic Skincare Pictures
- Invest in Quality Artificial Lighting (Because the Sun is Flaky)
- Minimalist Backgrounds for Perfect Aesthetic Skincare Pictures
- Use Raw Ingredients as Authentic Props
- Capture Intricate Textures with Macro Lenses
- Optimize Camera Settings for Pin-Sharp Details
- The Art of the Overhead Flat Lay Composition
- Ensure Consistency for Before and After Photos
- Embrace 2026 Trends: Sustainability and Water Elements
- Prioritize Authentic Editing and Creative Shadows
I spent four hours last Tuesday sitting on the sticky linoleum floor of my bathroom, trying to take aesthetic skincare pictures of a $45 serum. I taped a white bedsheet to the shower curtain rod, balanced my phone on a stack of toilet paper rolls, and ended up with photos that looked like a hostage situation. It’s embarrassing to admit, but getting those gorgeous, Pinterest-worthy shots isn’t just about throwing a bottle of lotion on a marble counter. I’m going to walk you through exactly how I stopped taking muddy, yellow-tinted disasters and started shooting photos that actually look professional. Let’s fix your feed.
1. Master Soft Natural Light for Aesthetic Skincare Pictures

I’m going to be completely honest with you. Getting the lighting right is the absolute hardest part of this entire process. I used to think that more light meant better photos. I’d drag my products out to the patio at noon, thinking the bright sun would make everything sparkle. Last summer, I took my brand new 1.7 oz jar of Tatcha Dewy Skin Cream, which costs a painful $72.00, and set it on a concrete table in direct midday sunlight. I spent twenty minutes adjusting my camera. By the time I looked closely at the jar, the intense heat had literally melted the luxurious purple cream. It turned into a greasy, separated puddle of milk right before my eyes. It was a total disaster.
Now, I exclusively shoot near a large, 5-foot tall north-facing window in my guest bedroom. North-facing windows are magic because they never let in direct, harsh sunbeams. Instead, you get this consistent, soft, and beautifully diffused natural light that lasts for hours. It naturally mimics the look of an expensive professional softbox. If your only window faces south or west, you aren’t completely out of luck. You just need to diffuse the light yourself. I went to Target and bought a basic set of sheer white curtain panels for $14.99. Hanging just one sheer panel over a bright window instantly softens the light, removing those ugly, deep black shadows that ruin the vibe of a photo. When that soft light hits the glass packaging of a serum, it creates a gentle, glowing highlight that looks incredibly expensive. You won’t believe the difference. Trust me on this.
2. Invest in Quality Artificial Lighting (Because the Sun is Flaky)

Relying entirely on the sun is a rookie mistake. The sun is flaky. It hides behind clouds right when you’re ready to shoot. When natural light fails me, I turn to my artificial setup. I tried to go the cheap route first. I bought a flimsy $12.00 LED desk lamp from Walmart, thinking I could just point it at my products. I tried to shoot a 1 oz bottle of The Ordinary Niacinamide 10% + Zinc 1% ($6.00) at 8 PM on my kitchen counter. The overhead fluorescent lights mixed with the cheap desk lamp made the clear, beautiful serum look like murky dishwater. It had this sickening yellow-green tint that no amount of editing could fix. Plus, the cheap bulb emitted this annoying, high-pitched buzzing sound that drove me crazy.
If you’re serious about this, you have to invest in a continuous LED panel light. I personally swear by the Godox SL-60W, which runs about $189.00. You pair that with a Neewer 24×24 inch softbox for around $35.99. The physical heat coming off the Godox light is noticeable, but the light quality is unmatched. It provides consistent, studio-quality diffused light that makes every single product look flawless. For extreme close-ups where I need to show the texture of a cream, I use a Neewer 18-inch Ring Light Kit ($89.99). I place it directly in front of the product, stick my camera lens right through the center hole, and shoot. It creates uniform, completely shadow-free illumination that captures every tiny detail without washing out the colors. You can’t fake good lighting in post-production.
3. Minimalist Backgrounds for Perfect Aesthetic Skincare Pictures

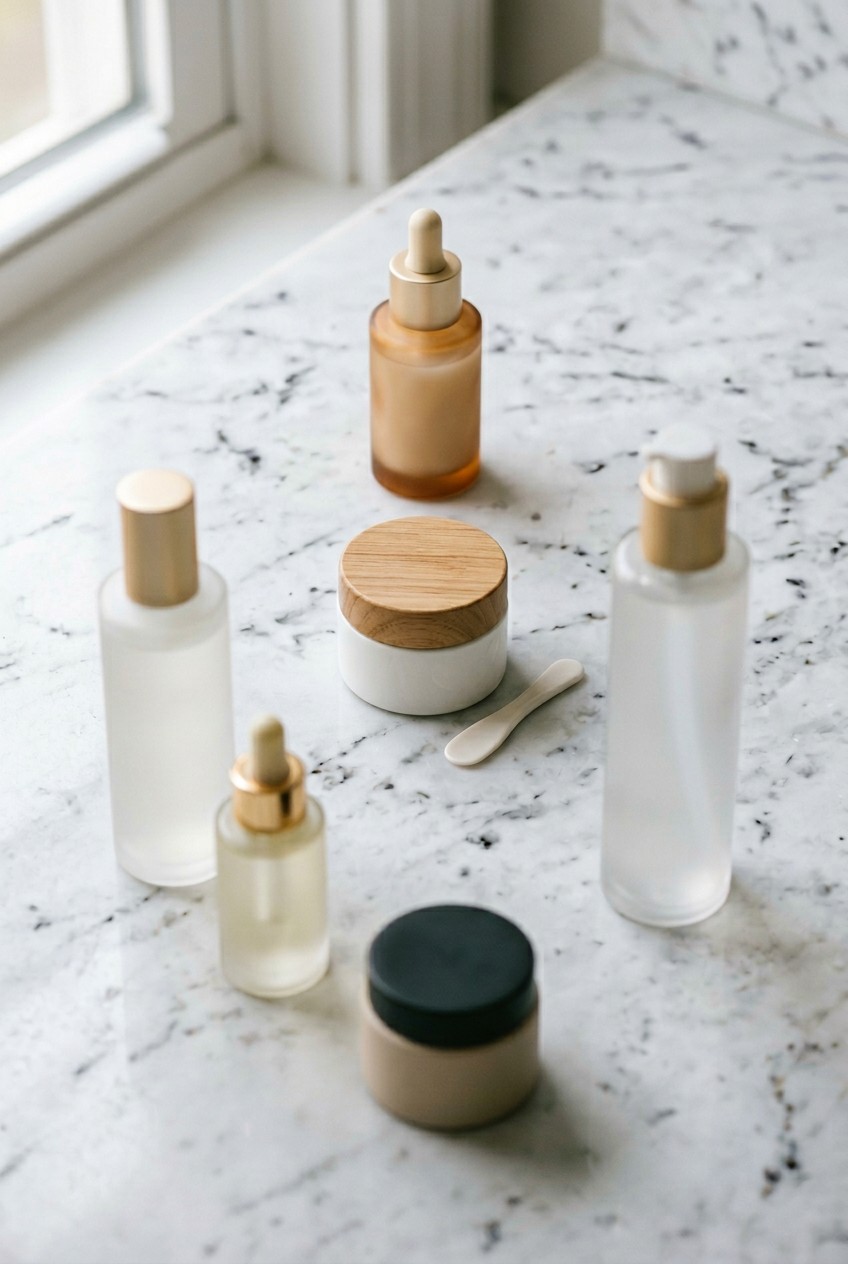
If you look at the major skincare campaigns projected for 2026, the dominant trend is hyper-minimalism. Cluttered backgrounds are completely out. I used to shoot my products resting on a fluffy pink faux-fur blanket. Looking back, it looked incredibly cheap and distracting. The texture of the blanket competed with the texture of the product, and the pink color reflected onto the bottles, ruining the white balance. You want your background to completely disappear so the product remains the undisputed focal point.
My absolute favorite hack for this costs less than twenty bucks. I refuse to buy those expensive, heavy marble slabs you see on Instagram. Instead, I went to Target and bought a thick, 20×30 inch white foam board for $3.99. Then, I bought a roll of matte faux marble contact paper from Amazon for $12.99. The sound of peeling the sticky backing off that paper and carefully smoothing it over the foam board with a plastic credit card is so satisfying. It creates a flawless, lightweight, and waterproof background. When I place a 12 oz bottle of CeraVe Hydrating Facial Cleanser ($14.99) on that fake marble, it instantly looks like it belongs in a high-end spa. The matte finish of the contact paper is crucial. If you buy glossy paper, it will reflect your camera lens and your lighting equipment, ruining the illusion. Stick to matte white, soft beige, or light gray paper backdrops. A clean, neutral background communicates a sense of luxury and sophistication that a messy bathroom counter simply won’t ever achieve. You might also like: 15 Charming Aesthetic Pictures Skincare Worth Trying This Year

Vtopmart 3 Tier Clear Makeup Organizer with Drawer
Vtopmart 3 Tier Clear Makeup Organizer with Drawer has been one of the most consistently praised picks in this category. 19 reviewers averaged 4.5/5.
4. Use Raw Ingredients as Authentic Props

One of the easiest ways to make your photos feel alive is to utilize the actual raw ingredients of the skincare product as physical props. A plain bottle sitting on a table is boring. A bottle interacting with its core ingredients tells a story. Last Friday at Whole Foods, I was wandering the produce aisle specifically looking for props. I bought three massive, perfectly round, waxy navel oranges for $4.50. I took them home, washed them, and sliced them into exact 1/4 inch thick wheels on my heavy wooden cutting board. The sharp, acidic smell of the fresh citrus juice was incredible, even though it made my fingers incredibly sticky. You might also like: 20 Brilliant Aesthetic Pink Skincare You Can Try Today
I arranged those bright, dripping orange slices in a semi-circle around a 1 oz bottle of Sunday Riley C.E.O. Glow Vitamin C Serum ($40.00). The contrast between the bright orange fruit and the golden oil inside the heavy glass bottle was stunning. It immediately communicates the product’s natural composition and brightening benefits to anyone scrolling past. I do this with everything now. If I’m shooting a soothing gel, I’ll buy a massive, spiky green aloe vera leaf, slice it open to reveal the clear, slimy center, and place the product right next to it. It adds so much visual interest and vibrant, organic color to the frame. Just make sure you’re using fresh ingredients. Wilted brown leaves or dried-out fruit will make your expensive skincare look expired and unappealing. Freshness is everything. You might also like: 20 Beautiful Aesthetic Night Skincare for Any Style
5. Capture Intricate Textures with Macro Lenses

People don’t just want to see the outside of the bottle; they want to know exactly what the product feels like before they spend their money. To capture those intricate, luxurious textures, you absolutely need to explore macro photography. I shoot with a Canon EF 100mm f/2.8L Macro IS USM lens, which is a hefty investment at around $799.00, but a cheaper 60mm macro lens works beautifully too. Before I got my macro lens, I tried to show the gritty, sandy texture of my 2 oz Kate Somerville ExfoliKate Intensive Pore Exfoliating Treatment ($78.00) by just smearing it on the back of my hand with my index finger. It looked terrible. It just looked like a gross, uneven green smudge.
Now, I treat the product like thick oil paint. I bought a tiny, 4-inch stainless steel artist’s palette knife for $4.50 at a local craft store. I scoop out exactly a pea-sized dollop of the scrub and place it on a clean piece of glass. Using the edge of the metal knife, I carefully drag the product into a perfect, satisfying 1/2 inch swirl. The macro lens allows me to get so incredibly close that you can actually see every single microscopic exfoliating bead and the rich, creamy base holding them together. It highlights the consistency perfectly. When you’re shooting macro, the depth of field is razor-thin, so you have to be incredibly precise with your focus. But when you nail it, the resulting image is mesmerizing. Learned that the hard way.
6. Optimize Camera Settings for Pin-Sharp Details

You can have the best lighting and the most expensive props in the world, but if your camera settings are wrong, your photos will look like garbage. For DSLR or mirrorless cameras, you must shoot in manual mode. Don’t let the camera guess what you want. I learned this the hard way. Last month, I was trying to shoot a beautiful, frosted 2.3 oz jar of Laneige Water Sleeping Mask ($32.00). I had just chugged a massive can of Kirkland Signature cold brew coffee from Costco, and my hands were shaking like crazy. I left the camera on auto, snapped the photo while standing up, and called it a day. When I uploaded the files, every single shot was a blurry, soft, out-of-focus mess because the shutter speed was too slow to compensate for my jittery hands.
Now, I follow a strict formula for pin-sharp details. First, I set my ISO as low as possible, usually between 100 and 200, to completely eliminate that ugly, grainy digital noise. Then, I set my aperture to f/8 or f/11. This creates a deep depth of field, ensuring the front label and the back of the bottle are both in sharp focus. Because that aperture lets in less light, I drop my shutter speed to 1/60 sec or even slower. You absolutely can’t hold the camera by hand at that speed. You must use a heavy, sturdy tripod. The satisfying click of locking my camera into the quick-release plate guarantees my shot will be perfectly crisp, every single time.

Eclat Skincare Vitamin C Serum – Skin Care for Dark Spots
Eclat Skincare Vitamin C Serum – Skin Care for Dark Spots punches above its price — 753 buyers rated it 4.5 stars. I would buy it again.
7. The Art of the Overhead Flat Lay Composition

Mastering the art of the aesthetic flat lay composition is essential for skincare photography. A good flat lay requires you to position your camera directly overhead, looking straight down at the products. Before I bought the right gear, I used to stand precariously on a wobbly wooden dining room chair, leaning over my kitchen table, trying to balance my heavy camera above my setup. I was trying to photograph a 3.38 oz bottle of COSRX Advanced Snail 96 Mucin Power Essence ($25.00). My foot slipped, I lost my balance, and I dropped my phone right onto the table, nearly shattering the thick plastic essence bottle. It was terrifying and completely unnecessary.
To do this safely and professionally, you need a tripod with a horizontal arm extension. I bought a sturdy metal extension arm for $35.99, and it completely changed my workflow. It holds the camera perfectly parallel to the table, giving me a stable, consistent framing without risking my neck. When arranging the products, I always use compositional guides like the rule of thirds or strong diagonal lines. I never just dump the bottles in the center. I’ll place the tallest bottle in the top right quadrant, balance it with a smaller jar in the bottom left, and scatter a few organic props in between to create a visual flow. You want the viewer’s eye to dance across the image, taking in every detail naturally. It takes practice, but perfectly balanced flat lays are incredibly satisfying to look at.
8. Ensure Consistency for Before and After Photos

If you’re documenting your skin’s progress to review a product, you have to ensure unwavering consistency for your ‘before and after’ photos. Most people get this entirely wrong. I certainly did. When I was tracking how well a 1.35 oz tube of La Roche-Posay Effaclar Duo ($35.99) was clearing up my hormonal jawline acne, my documentation was a joke. I took my ‘before’ photo in my dark, yellow-lit bathroom at 10 PM. Four weeks later, I took my ‘after’ photo sitting in my car at noon in blinding, direct sunlight. I looked like a completely different human being. When I posted the comparison, the comments ripped me apart, accusing me of faking the results.
You can’t let that happen. You must maintain identical lighting, identical camera angles, and identical backgrounds. I now take three specific angles: full face, 45 degrees left, and 45 degrees right. I use a small square of blue painter’s tape on my bedroom floor to mark the exact spot I need to stand. I set up my tripod in the exact same position, at the exact same height, measuring the distance with a tape measure. I pull my hair back tightly with a black claw clip and maintain a completely neutral, relaxed facial expression. Smiling changes the shape of your cheeks and hides pores. I picked up my latest tube of Effaclar at the Kroger pharmacy section, and using this strict, scientific method, the visual proof of my skin clearing up is undeniable and totally trustworthy.
9. Embrace 2026 Trends: Sustainability and Water Elements

If you want your photos to look modern, you need to embrace the upcoming 2026 trends of sustainability and hyper-realism. Consumers are exhausted by flat, sterile images. They want texture, and they want to see products interacting with the elements. One of the most effective ways to emphasize hydrating or refreshing product benefits is to strategically incorporate water. I used to just splash water from my sink onto the bottles, which just created an uncontrollable, messy puddle that ruined my paper backgrounds.
Now, I use a highly controlled method. I bought a cheap, fine-mist plastic spray bottle from Sprouts for $2.99. I fill it with exactly 1/2 cup of cold tap water. When I shoot a hydrating product, like a 1.7 oz jar of Neutrogena Hydro Boost Water Gel ($19.99), I gently mist the outside of the container. The water forms these tiny, perfectly round, delicate beads resting on the cool blue plastic. It instantly makes the product look incredibly refreshing and quenching. Another surprising trick I’ve learned for flat lays is to use a large sheet of glass. I lay the glass flat over a neutral background and carefully pour a 1/8 inch layer of water directly onto the glass. When you place the products in this shallow pool, it creates unique, dynamic reflections and ripples that look like a high-end commercial shoot. It’s a little messy to clean up, but the visual impact is absolutely worth the effort.

Masirs Clear Makeup Organizer
Honestly, Masirs Clear Makeup Organizer – 16-Compartment Cosmetic and Jewelry Ho surprised me — sturdier than it looks in the photos, and over 258 buyers gave it 4.5 stars.
10. Prioritize Authentic Editing and Creative Shadows

The final step is post-processing, and the golden rule here is to prioritize authentic editing. The era of plastic, heavily airbrushed skin is over. The massive 2026 trend favors a perfectly imperfect aesthetic that values relatability over artificial perfection. I admit, I used to abuse skin-smoothing apps. I’d blur my face until I had no pores, no texture, and no humanity left. I’d use a 50mm lens to blur the background of my bedroom while holding a 0.5 oz jar of Kiehl’s Creamy Eye Treatment with Avocado ($38.00), and then I’d edit my under-eyes until I looked like a featureless mannequin. It was embarrassing. No exaggeration.
Now, I focus strictly on natural enhancements. I adjust the color balance to ensure the product packaging looks accurate. I tweak the exposure and contrast to make the image pop. I will perform very minimal blemish removal if there’s a distracting red spot, but I leave my natural skin texture completely intact. Another surprising tip to add depth during the shoot is to intentionally use creative shadows. Instead of aiming for flat, shadow-free images, I went to Trader Joe’s and bought a live Monstera plant for $12.99. I hold a massive, fenestrated green leaf just out of frame, between my light source and the product. It casts these gorgeous, sharp, tropical shadows across the background and the product itself. It adds dimension, artistic flair, and a premium, mood-driven aesthetic that makes the photo incredibly engaging. Embrace the shadows; they aren’t your enemy.
Taking aesthetic skincare pictures at home doesn’t require a Hollywood studio, but it does require patience and a willingness to learn from your mistakes. I’ve ruined enough expensive creams and taken enough blurry photos to know that the magic is in the details. Once you dial in your lighting, stabilize your camera, and start playing with textures and raw ingredients, your photos will completely change. I’d highly recommend starting with the foam board and contact paper trick—it’s the cheapest and fastest way to upgrade your feed instantly. Let’s make your skincare routine look as luxurious as it feels. If you found these tips helpful, make sure you save or pin this post so you can reference these exact camera settings and prop ideas before your next photoshoot!
Frequently Asked Questions
What is the best lighting for aesthetic skincare pictures?
Soft, diffused natural light from a north-facing window is ideal. If you’re shooting at night, a continuous LED panel with a softbox provides the most flattering, shadow-free illumination for product photography.
How do I make my skincare flat lays look professional?
Use a neutral background like matte white foam board or faux marble contact paper. Mount your camera on a tripod with a horizontal arm extension to shoot directly overhead, and use the rule of thirds for balanced composition.
What camera settings are best for sharp product photos?
Shoot in manual mode. Keep your ISO low (100-200) to reduce noise, use an aperture of f/8 to f/11 for a deep depth of field, and use a tripod with a shutter speed of 1/60 sec or slower.
How should I edit before and after skincare photos?
Prioritize authentic editing. Adjust exposure and color balance to match reality, but avoid heavy skin-smoothing apps. The current trend favors natural, perfectly imperfect skin textures over heavily airbrushed, artificial results.
