What’s Inside
- Master Diffused Lighting for Juicy Skincare Texture Photography
- Employ a True Macro Lens for Intricate Detail
- Utilize a High Aperture for Maximum Sharpness
- Create Dynamic Swatches with Precision Tools
- Incorporate Rim Lighting for Definition and Depth
- Choose Backgrounds Strategically to Complement
- Embrace the Perfectly Imperfect Aesthetic
- Leverage Hyper-realistic Macro Skincare Texture Photography
- Use a Black Bounce Card for Enhanced Depth
- Experiment with Oblique Lighting to Emphasize Roughness
Last Tuesday at Whole Foods, I bought a 2 oz jar of blue tansy face cream for $34.99. It looked like a magical glowing potion in the aisle, but when I rushed home and tried snapping a quick picture on my kitchen counter, it looked like a puddle of melted Smurf ice cream. Mastering skincare texture photography is a nightmare if you don’t know the right tricks. I spent months posting flat, lifeless blobs of expensive serums before I finally figured out how to capture that juicy, tactile look. You want people to scroll through their feed and actually feel the gritty sugar scrub or the cooling gel just by looking at the screen. I’m going to walk you through exactly how I shoot my products now. I’ve ruined enough backdrops and wasted enough expensive night creams to know what works. Grab your camera. Let’s fix your feed.
1. Master Diffused Lighting for Juicy Skincare Texture Photography

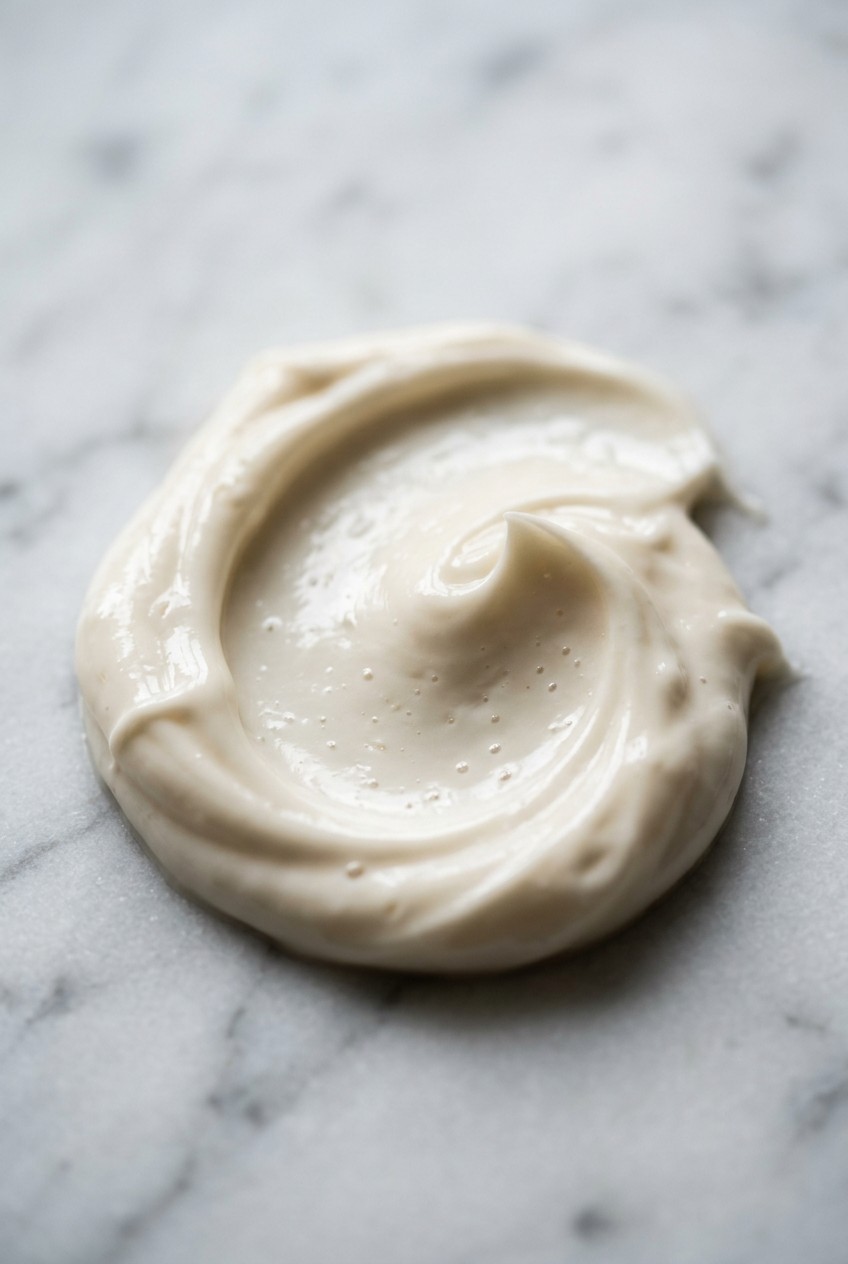
I bought a cheap ring light at Target for $29.99 a few years ago. Huge mistake. It made a beautiful 1 oz bottle of squalane oil look like cheap cooking grease. You need diffused light. I swear by the Godox FV150. It runs around $300 to $500 depending on where you buy it. You pair that with a Neewer 26 inch Softbox for about $50 to $100. Position two of these softboxes at 45 degree angles on either side of your product. This creates a smoother and juicier texture image. The light wraps around the blob of cream. It softens the harsh shadows that usually ruin a close up shot. If you’re on a budget, just use a north facing window. You can soften the sunlight with a sheer white curtain. I did this in my old apartment. I taped a $5.99 sheer panel from Walmart right over the glass. It works perfectly for highlighting the wet, glossy finish of a hyaluronic acid serum without blowing out the highlights. Harsh light is the enemy of a good gel moisturizer. It just makes the product look plastic and fake. Softboxes are invaluable for emphasizing the texture of skincare items. They make a $10 drugstore cream look like a $100 luxury treatment. The way a thick, opaque ceramide cream catches diffused light is beautiful. It creates a soft gradient across the curved surface of the swatch. You can actually see the dense, buttery consistency. It makes the viewer want to reach out and touch it. Trust me on this.
2. Employ a True Macro Lens for Intricate Detail

I tried this wrong for months before figuring it out. I’d just hold my phone camera three inches away from a 4 oz tub of body butter and wonder why the edges were always blurry. You need a dedicated macro lens to capture the minute details of skincare textures. I’m talking about the fine granules of a walnut exfoliant or the subtle ripples of a whipped night cream. Some photographers use versatile lenses like the Tamron 18-300mm f/3.5-6.3 Di III-A VC VXD. That usually costs around $600 to $700. It works fine for general lifestyle shots. But a true macro lens will yield the absolute most detail. If you’re budget conscious, pick up a 50mm f/1.8 lens. We call this the nifty fifty. You can find them for $100 to $250. It offers decent close up capabilities and a really pleasing background blur. I bought my nifty fifty at a local camera shop after getting frustrated with a $15.99 8 oz jar of salt scrub I bought at Sprouts. The salt crystals were beautiful in person. They looked like tiny crushed diamonds. But my standard kit lens just turned them into a blurry white blob. The macro lens changed everything. Suddenly, you could see the sharp edges of every single grain of salt. You could see the thick, viscous oil pooling around the crystals. It’s totally worth the investment. Don’t rely on digital zoom. It just pixelates the image and destroys the very texture you’re trying to highlight.
3. Utilize a High Aperture for Maximum Sharpness

Most people get this wrong. I definitely did. I used to shoot all my swatches at f/1.4 because I loved that dreamy, blurry background look. But when you’re shooting a 2 oz jar of thick clay mask, a wide open aperture means only a tiny sliver of the product is actually in focus. The rest just melts into a fuzzy mess. To ensure every detail of the texture is crisp and in sharp focus, you must set your camera to a high f-stop. Use a small aperture. Aim for an aperture of f/11 or higher. Honestly, f/22 is highly recommended for macro and product work to maximize texture. I learned this the hard way last month. I bought a gorgeous 1.7 oz jar of gel moisturizer from Kroger for $12.99. It had these tiny suspended vitamin capsules inside. I shot it at f/2.8. The photos were useless. You couldn’t even tell what the capsules were. A common mistake is using a lower aperture to increase light. This inadvertently softens the texture. You lose all the gritty, tactile details that make a product look effective. If your image is too dark at f/22, don’t drop your aperture. Slow down your shutter speed. Use a tripod. I bought a basic tripod for $39.99 on Amazon just for this. When you shoot at f/22, a thick dollop of shea butter looks incredibly sharp from the front edge all the way to the back. You can see every tiny crack and crevice in the swipe. You might also like: 15 Brilliant Aesthetic Instagram Night Routine Skincare That Actually Work

EQQUALBERRY Vitamin Illuminating Serum | Niacinamide 4% +
EQQUALBERRY Vitamin Illuminating Serum | Niacinamide 4% + Brightening has been one of the most consistently praised picks in this category. 101 reviewers averaged 4.5/5.
4. Create Dynamic Swatches with Precision Tools

Stop using your fingers to smear products on a board. I used to just dip my finger into a 16 oz tub of Cetaphil that I got at Costco for $14.49 and swipe it across a piece of paper. It always looked messy. It looked like a toddler’s finger painting project. You need specific tools to craft visually appealing and realistic texture swatches. For creams and lotions, a metal palette knife is absolute perfection. You can grab a set in any art supply store for $5 to $20. The flat metal edge is ideal for creating a standard curved teardrop shape. You can also use it to build up concentrated mounds for an opaque, thicker smear. For liquid serums and facial oils, you need a dropper. You can buy a pack of glass droppers on Amazon for $10 to $20. They give you precise control to form perfect droplets or small puddles without splashing. I was shooting a $9.99 1 oz bottle of rosehip oil I picked up at Trader Joe’s last week. The dropper allowed me to place three perfectly round, golden beads of oil onto a glass plate. The surface tension held them in these beautiful little domes. If I’d just poured it from the bottle, it would have been a flat, greasy mess. Precision tools are mandatory. They take your swatches from looking like accidental spills to looking like intentional art. The palette knife also helps you control the thickness of a cream. You press down hard at the start of the swipe and lift up gently at the end. This creates a beautiful, fading tail that shows off the sheer finish of a moisturizer. You might also like: 15 Brilliant Aesthetic Green Skincare You Haven’t Thought Of
5. Incorporate Rim Lighting for Definition and Depth

Shooting white lotions on a white background is a nightmare. I spent three hours crying over a $19.99 8 oz bottle of vanilla body lotion I bought at Target. The lotion completely disappeared into the white poster board. It looked like a blank photo. To add a three dimensional quality and separation from the background, you have to implement rim lighting. Position a light source directly behind the product, slightly off to the side, pointing back toward the camera. This creates a subtle, glowing outline around the edges of the cream. This technique is especially effective for photographing white products against white backgrounds. It helps them stand out and look tangible. The rim light catches the very top edge of a textured swatch. It highlights the glossy peaks of a whipped body butter. I use a small, cheap LED panel I found for $25.99 to create my rim light. I place it low and behind the swatch. Suddenly, that invisible white lotion has a bright, crisp edge. It pops off the background. You can actually see the height and volume of the smear. Without rim lighting, your textures won’t have depth. They’ll just look flat and two dimensional. They won’t have that juicy, touchable quality. It’s a small extra step, but it completely changes the visual impact of a thick, opaque cream. You want the viewer to feel the density of the product. Rim lighting gives you that depth and makes the product look real. Took me years to figure out. You might also like: 15 Creative Aesthetic Rhode Skincare to Transform Your Space
6. Choose Backgrounds Strategically to Complement

Your background should never compete with your product. I made a huge mistake early on. I bought this crazy floral scrapbook paper from a craft store for $1.99 a sheet. I tried to shoot a clear, 2 oz peeling gel on it. The floral pattern showed right through the gel. You couldn’t see the texture of the product at all. You must select backgrounds that enhance the product’s features without diverting attention. For minimalist brands, a simple white or light colored background is incredibly effective. I love using vinyl backdrops. You can get them for around $30 online. They offer amazing versatility. The best part is that they are totally waterproof and easy to clean. I spilled half a bottle of a $14.99 4 oz cleansing oil from Walmart on my vinyl backdrop. I just wiped it right off with a paper towel. If you’re on a tight budget, foam boards are a lifesaver. You can buy a pack of 10 for about $15. They provide an affordable option for creating a clean, reflective surface. I use a white foam board as my base for almost everything now. Avoid busy or inconsistent backgrounds. They are common mistakes that severely detract from the product. If you want a luxurious feel, consider investing in a real marble slab or some dark velvet fabric. Just remember that the texture of the skincare is the star of the show. The background is just the supporting cast.

Masirs Clear Makeup Organizer
Honestly, Masirs Clear Makeup Organizer – 16-Compartment Cosmetic and Jewelry Ho surprised me — sturdier than it looks in the photos, and over 258 buyers gave it 4.5 stars.
7. Embrace the Perfectly Imperfect Aesthetic

Stop trying to make every single swatch look like a flawless, machine made teardrop. A massive trend for 2026 is the perfectly imperfect aesthetic. This style values authenticity and relatability over flawless, overly polished images. People are tired of seeing impossible perfection. It looks fake. I used to spend twenty minutes trying to get a 1/2 cup scoop of a clay mask to look completely smooth. I’d use my palette knife over and over until the mask started to dry out and crack. Now, I allow for subtle, natural imperfections. I leave a little bit of intentional mess. A slightly jagged edge on a thick cream swatch makes it feel more approachable. It increases engagement. As experts note, imperfections once considered mistakes now convey trust, personality, and a sense of real life. I was shooting a $14.95 1 lb tub of Aztec Secret Indian Healing Clay that I mixed with apple cider vinegar. Instead of smoothing it out perfectly, I just dropped a heavy, lumpy spoonful onto the board. I left the little air bubbles and the gritty chunks visible. It looked earthy and real. It looked like something you’d actually mix up in your bathroom sink on a Sunday night. Don’t be afraid of a soft focus on the edges or a candid, slightly chaotic arrangement. Consumers want to see the honest texture. If a scrub is chunky and uneven, show it exactly like that. The messy reality is always more appealing than a sterile, plastic looking smear.
8. Leverage Hyper-realistic Macro Skincare Texture Photography

You need to get uncomfortably close to your products. Another major 2026 trend is hyper-realistic macro photography. This approach is all about emphasizing the absolute smallest details and textures. It showcases the craftsmanship and quality of the formula. I’m talking about getting so close that you can see the tiny, suspended air bubbles in a clear gel. This is perfect for highlighting the intricate textures of a hydrating mask or the unique composition of a serum. It makes the product’s quality the true visual focal point. I tried this recently with a $8.99 1.7 oz Daily Facial Superminder I bought at Trader Joe’s. It’s a very basic, lightweight lotion. But when I used my macro lens and got within an inch of a small dollop, it transformed. You could see the microscopic peaks where the lotion pulled away from the tube. You could see the subtle, watery sheen on the surface that indicated how hydrating it was. Hyper-realistic photography forces the viewer to stop scrolling. They have to pause and figure out what they are looking at. It turns a boring puddle of serum into an abstract landscape of moisture and light. Don’t just show the whole swatch. Crop in tight. Show the very edge of the smear where the product thins out and becomes translucent. Show the heavy, opaque center. Give them a microscopic tour of the formula. This level of detail builds trust. When a customer can see the exact consistency of a $65 night cream before they buy it, they feel much more confident in their purchase.
9. Use a Black Bounce Card for Enhanced Depth

White bounce cards are great for filling in shadows, but sometimes you actually need more shadows. To add serious depth and dimension to your texture shots, you must strategically incorporate a black bounce card. Position it right next to the product to absorb light. This creates much more pronounced shadows on the opposite side of your light source. These deep shadows can make textures appear significantly more dimensional and tactile. I was struggling to photograph a $22.00 4 oz jar of whipped tallow balm. It was so fluffy and white, but under my softboxes, it just looked like a flat white circle. There was no definition. I ran to a local craft store and bought a single sheet of black foam core for $3.99. I propped it up right next to the swatch, blocking the light from hitting the right side of the balm. The difference was shocking. Suddenly, every single whipped peak and swirl cast a tiny, dark shadow. The balm looked incredibly thick and rich. It looked like you could reach right into the photo and scoop it up. A black bounce card is the cheapest tool in my studio, but it’s the most powerful for creating contrast. When you’re dealing with very light colored creams or pastel clay masks, you need those shadows to define the shape. Don’t be afraid of the dark. Embrace the shadows to carve out the texture. It’s a simple trick. Just move the black card closer to the product until you see the shadows deepen. It instantly makes a flat image look like a high end editorial shot.

Eclat Skincare Vitamin C Serum – Skin Care for Dark Spots
Eclat Skincare Vitamin C Serum – Skin Care for Dark Spots punches above its price — 753 buyers rated it 4.5 stars. I would buy it again.
10. Experiment with Oblique Lighting to Emphasize Roughness

Soft lighting is great for smooth gels, but it ruins exfoliants. To make specific, gritty textures pop dramatically, you have to use harsh, directional light from the side. We call this oblique lighting. You want to use an oblique angle with minimal or absolutely no diffusion. This technique creates very strong, long shadows and bright highlights. It accentuates the contours and the roughness of the product. It’s ideal for showcasing exfoliating beads, gritty mud masks, or unique, chunky product consistencies. I bought an 8 oz tub of Tree Hut Sugar Scrub for $7.99 at Walmart. I tried shooting it with my big softboxes. It looked like pink mush. You couldn’t see the sugar crystals at all. I turned off the softboxes and just used a bare, harsh LED bulb shining directly from the left side, almost parallel to the table. The sugar crystals instantly lit up like tiny glass beads. The long shadows behind each grain made the scrub look incredibly rough and exfoliating. No exaggeration. One major pro tip here. Ensure your products and their packaging are meticulously clean before you shoot with harsh light. Harsh light reveals every single flaw. Use microfiber towels for general cleaning. For stubborn oily residues, alcohol wipes are highly effective. Just exercise caution to avoid contact with your camera lens. Forgetting to wipe a greasy fingerprint off a glass jar is a common and easily avoidable mistake. The harsh side light will highlight that fingerprint just as much as it highlights your sugar scrub.
Honestly, mastering this takes practice. I’ve wiped hundreds of failed swatches off my foam boards. But once you nail the lighting and the tools, your photos will completely transform. I highly recommend starting with a cheap palette knife and a single harsh light to practice on an exfoliant. It’s the easiest way to see how shadows create texture. Please don’t over-edit your final photos. Keep adjustments minimal to preserve the genuine feel of the product. Over-smoothing just creates an unrealistic expectation for the product. Save this guide for your next shoot. Pin it to your photography mood board so you don’t forget the aperture settings. You’re going to do great.
Frequently Asked Questions
What lens is best for skincare texture photography?
A dedicated macro lens is absolutely essential. I highly recommend a 50mm f/1.8 or a specialized macro lens to capture the tiny granules of exfoliants and the sharp edges of thick creams without blurring.
How do I light a clear skincare serum?
Use two softboxes positioned at 45-degree angles to create diffused light. This wraps around the clear gel, highlighting the glossy finish and suspended air bubbles without creating harsh, distracting reflections on the wet surface.
Why are my skincare swatches always blurry?
You’re likely using an aperture that’s too wide. For skincare texture photography, you must shoot at a high f-stop, like f/11 or f/22. This ensures the entire dollop of cream is in sharp focus.
What tools do I need to make perfect lotion swatches?
Ditch your fingers. You need a metal palette knife for spreading thick creams into clean, curved teardrops, and glass droppers for placing perfectly round beads of facial oils onto your background.
