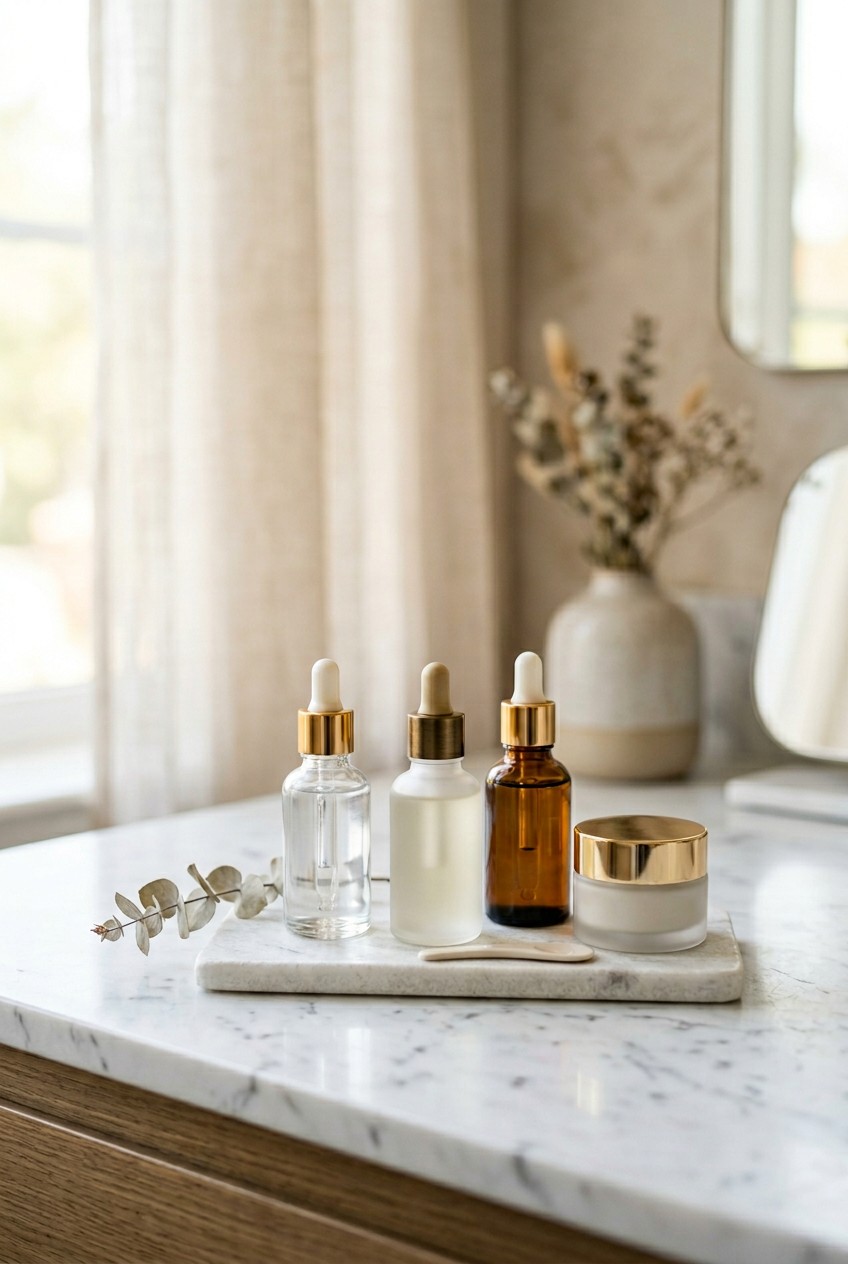
What’s Inside
- Master the Art of Texture Shots for Your Skincare Videos Aesthetic
- Optimize Lighting for a Soft Focus Vibe
- The Ice Cube Trick for Cooling Gels
- Water Splashes That Won’t Ruin Your Bathroom
- ASMR Tapping on Glass Bottles
- Perfecting the Swatch Smear Without Wasting Product
- Using Mirrors for That Dreamy Reflection
- Creating the Ultimate Skincare Videos Aesthetic with Props
- The Slow-Motion Dropper Shot
- Frothy Cleanser Bubbles That Actually Last
- Color Coordinating Your Backgrounds
- The Satisfying Peel-Off Mask Reveal
- Capturing the Glow Without Looking Greasy
- Organizing Your Vanity for the Final Shot
Last Tuesday at Target, I shattered a 1 oz bottle of $48 Glow Recipe dew drops trying to film a one-handed product swirl. It was a sticky, expensive disaster in aisle 14. Nailing that perfect skincare aesthetic is way harder than those viral TikToks make it look. You’re balancing slippery glass, awkward lighting, and trying to look effortlessly glowing all at once. I’ve spent three years figuring out how to make serums and creams look mouthwatering on camera. Let’s skip the trial and error. I’m going to walk you through how I shoot my routines now. These are the techniques that stopped my videos from looking like a hostage situation in a fluorescent bathroom. You can’t just point your phone at a bottle and expect magic. It takes a little strategy, some cheap props, and knowing how to manipulate light. Learned that the hard way.
1. Master the Art of Texture Shots for Your Skincare Videos Aesthetic

I’m obsessed with capturing the tactile quality of creams. You want the viewer to feel the hydration through their screen. Capture those details using a macro lens to highlight textures. For creams, gels, and oils, use palette knives to create dimensional smears. This changed how I shoot completely. I used to just use my fingers, and it looked like a messy toddler’s project. Last month at Walmart, I bought a 1.7 oz jar of e.l.f. Holy Hydration Face Cream for $13.00. I scooped out exactly 1/2 teaspoon of the whipped-butter cream with a metal palette knife. When shooting gels, keep the product in a small mound for a thicker smear. To add depth, use a black bounce card to emphasize shadows. This makes textures look dimensional. If you’re using thin lotion, it’ll run everywhere. Stick to the thick stuff. The contrast of the white e.l.f. cream against a dark shadow looks ridiculously expensive. You can’t just slap lotion on your hand and call it a day. The palette knife gives you sharp, satisfying edges. Trust me.
2. Optimize Lighting for a Soft Focus Vibe

Lighting makes or breaks your content. Use diffused light to create gentle shadows. It’s crucial for consistent, flattering visuals. Softbox lighting or lightboxes are great for a uniform look. A ring light, or Diva Light, is super popular. I swear by the Stellar Photo/Video 18 inch CFL Compact Fluorescent Ring Light. It costs $120.00 online. But here’s a warning: don’t put it directly in front of your face on full blast. I did that for months. I looked like a terrified alien with glowing white circles in my pupils. Instead, bounce the light off a wall or use a thick cloth. Yesterday I found a 2-pack of white microfiber towels at Costco for $14.99. I drape one over my ring light to soften the glare. It’s the cheapest lighting hack I’ve found. You’ll love how it blurs skin imperfections instantly without washing out your features.
3. The Ice Cube Trick for Cooling Gels

Nothing looks better than condensation rolling down a frosted glass jar. It screams refreshing. I learned this after a disaster with warm lights melting my products. I was shooting a 2 oz jar of Trader Joe’s Watermelon Overnight Face Mask. It costs $6.99. Under hot lights, the pink gel turned into a sad puddle in four minutes. Now, I keep my gel products in the fridge for two hours before recording. When I pull that cold glass jar out, the room temp air creates gorgeous, frosty condensation. I also place 3 large, clear fake acrylic ice cubes next to the jar. They aren’t expensive, usually $9.99 on Amazon. Real ice melts and ruins your backdrop. Acrylic ice gives you that spa vibe without the mess. It’s a tiny detail, but it makes the viewer crave that cooling sensation. Plus, the fake ice catches the ring light beautifully.

6Pcs Jade Roller for Face
Honestly, 6Pcs Jade Roller for Face surprised me — sturdier than it looks in the photos, and over 28 buyers gave it 4.5 stars.
4. Water Splashes That Won’t Ruin Your Bathroom

We all want that commercial shot where water splashes across a glowing face. Let me tell you the truth. Doing this in your bathroom sink is a nightmare. I tried it last year and flooded my vanity. Water got into my power strip and shorted out my blow dryer. Now, I fake it. I use La Roche-Posay Thermal Spring Water mist. A 10.1 oz can is $18.99 at Kroger. Instead of splashing tap water, I hold the mist 6 inches from my face. I spray for 4 seconds while recording in slow motion at 120 fps. The tiny, uniform droplets catch the light beautifully. It looks refreshing, but your floor stays dry. You’re getting the same visual payoff without needing a mop. I’m never going back to the messy sink. It’s so much easier to control the mist than a handful of splashing water. You might also like: 20 Creative Aesthetic Korean Skincare Worth Trying This Year
5. ASMR Tapping on Glass Bottles

Sound design is half the battle. People love the click-clack of heavy glass. It subconsciously signals luxury. Cheap plastic bottles just thud. They don’t have that crisp sound. I always feature my 1 oz bottle of The Ordinary Hyaluronic Acid 2% plus B5. It’s $8.90, but the frosted glass dropper bottle sounds like a $100 serum when you tap it. I use my fingernails to tap a quick, rhythmic pattern. Just 3 quick taps. I hold my phone mic 2 inches away to capture the crisp audio. Last week at Whole Foods, I bought a 4 oz bamboo soap dish for $5.99. I set the bottle on the bamboo before tapping. The wood absorbs harsh echoes and makes the sound warmer. It’s wildly satisfying. Bad audio ruins a beautiful shot, so don’t ignore your sound. You might also like: 15 Gorgeous Aesthetic Glass Skin That Changed Everything
6. Perfecting the Swatch Smear Without Wasting Product

You’ve seen those thick ribbons of cream swiped across a hand. Getting that right takes practice. I used to waste so much moisturizer trying to get the perfect swoop. I’d wipe off half a jar and feel guilty. Now, I practice with cheap drugstore staples first. I keep a 16 oz tub of CeraVe Moisturizing Cream on hand. It costs $17.91 at Walmart. The texture is thick, matte, and holds its shape. I scoop 1/4 teaspoon onto the back of my hand. The trick is to use the side of your thumb, not your index finger. Press down firmly and drag in one smooth motion for 3 inches. Don’t hesitate. The CeraVe leaves a beautiful, opaque white trail. Once you’re comfortable with the pressure, swap in your expensive night creams without panicking about waste. You might also like: 20 Gorgeous Acne Skincare Routine for Any Style

COSRX Vitamin E Vitalizing Sunscreen
Honestly, COSRX Vitamin E Vitalizing Sunscreen surprised me — sturdier than it looks in the photos, and over 42 buyers gave it 4.5 stars.
7. Using Mirrors for That Dreamy Reflection

Adding a mirror to your flat lay creates instant depth. It makes a tiny space look huge. But mirrors are dust magnets. I shot an entire routine once, only to realize in editing that my mirror was covered in lint. It looked terrible. Now, I clean my mirrors obsessively. I use a 2 oz spray bottle with half vinegar and half distilled water. I wipe it down with a lint-free cloth right before I hit record. I love shooting my 1.7 oz jar of Neutrogena Hydro Boost Water Gel on a mirror. It runs $19.99 at Target. The blue gel reflects off the glass, making it look like a glowing pool. I prop the jar up on a 1 inch acrylic block so it looks like it’s floating. It’s a simple trick, but it makes a basic moisturizer look like editorial art. Just make sure your camera lens isn’t visible in the reflection!
8. Creating the Ultimate Skincare Videos Aesthetic with Props

A bare bottle on a table is boring. You need props to tell a story about the ingredients. If a product has rose extract, you need real roses in the frame. I keep fresh herbs and flowers in my fridge for filming. Last Sunday, I picked up fresh eucalyptus at Sprouts for $4.99. I scattered 5 loose leaves around a bottle of Heritage Store Rosewater. The 8 oz bottle is $11.49. The green leaves contrast beautifully with the pink liquid. But here’s my rule: less is more. I once buried a face wash in a pile of coffee beans and orange slices. It looked like a messy kitchen counter, not a spa. Keep the props pushed to the outer edges. Let the product be the star. The props should frame the bottle, not hide it.
9. The Slow-Motion Dropper Shot

The slow-motion serum drop is a classic. It’s mesmerizing. But getting the liquid to fall in focus is frustrating. I’ve spent hours trying to catch a drop mid-air, only to have my camera focus on the background. The secret is to lock your auto-focus first. I hold a pen where I want the drop to fall. I lock the focus on the pen, pull it away, and squeeze the dropper. I use Mad Hippie Vitamin C Serum for this. A 1.02 oz bottle is $33.99 at Whole Foods. The serum has a thick, golden texture that looks amazing in slow motion. I squeeze 2 drops out of the pipette. Because the serum is viscous, it forms a perfect, plump teardrop before falling. Watery serums just splash and disappear. You need a thicker liquid to really catch the light.

Eclat Skincare Vitamin C Serum – Skin Care for Dark Spots
Eclat Skincare Vitamin C Serum – Skin Care for Dark Spots has been one of the most consistently praised picks in this category. 753 reviewers averaged 4.5/5.
10. Frothy Cleanser Bubbles That Actually Last

Foaming cleansers are hard to film. The bubbles pop within seconds. By the time you hit record, you’re left with flat liquid. I struggled with this for years. I’d pump out a mountain of foam, and it would vanish before I got my angles right. The trick is to cheat. I use Cetaphil Daily Facial Cleanser. The 16 oz bottle is $14.47 at Target. Instead of lathering with my hands, I use a plastic foam maker cup. You can buy them for $5.00 online. I add 1 pump of cleanser and 1 tablespoon of warm water. I pump the handle for 10 seconds. This creates a dense, shaving-cream-like foam that refuses to pop. I scoop out a handful of this thick lather. It holds its shape under hot lights for five minutes. It looks plush and luxurious, and you won’t have to rush.
11. Color Coordinating Your Backgrounds

Your background color changes the mood. A white background feels clinical. A pastel background feels youthful. I used to shoot everything on my dark brown dining table. It made my fun skincare products look muddy. Now, I use seamless paper backdrops. They’re cheap and change the vibe. I love shooting the Byoma Creamy Jelly Cleanser against a matching pastel backdrop. The 5.9 oz bottle is $12.99 at Target. It has vibrant peach and yellow packaging. I bought a roll of soft peach craft paper for $8.99 and taped it to my wall, letting it swoop onto my table. I place the Byoma bottle in the center. The monochromatic look is soothing. It stops people from scrolling because the palette is cohesive. Just make sure your paper is smooth. Wrinkles will ruin the illusion and make your setup look cheap.
12. The Satisfying Peel-Off Mask Reveal

Everyone loves a good peel-off mask. The reveal is pure dopamine. But if you apply the mask too thin, it rips into annoying shreds. I’ve posted videos where I’m aggressively picking at tiny blue flakes on my forehead. Not a cute look. To get that one-piece pull, you have to apply it thick. I use the Freeman Cucumber Peel-Off Mask. A 6 oz tube is only $4.99 at Kroger. I squeeze 2 tablespoons of the clear green gel. I use a flat silicone brush to paint a thick, even layer, avoiding my eyebrows. You have to let it dry completely. I wait 25 minutes. If it’s damp, it won’t peel right. Once the edges lift, I smile to loosen it. Then, I grab the edge under my chin and pull upward in one continuous motion. The camera loves the glossy texture.

EQQUALBERRY Vitamin Illuminating Serum | Niacinamide 4% +
A dependable everyday pick — EQQUALBERRY Vitamin Illuminating Serum | Niacinamide 4% + Brightening pulls in 101 ratings at 4.5 stars. Not flashy, just solid.
13. Capturing the Glow Without Looking Greasy

There’s a fine line between looking dewy and looking like a slice of greasy pizza. I’ve crossed that line. I once slathered my face in rosehip oil. Under the harsh ring light, my forehead looked like an oil slick. I looked sweaty, not radiant. Now, I use targeted highlighting instead of an all-over oil bath. I rely on Aquaphor Healing Ointment. A 1.75 oz travel tube is $5.99 at Walmart. I take a pea-sized amount and warm it between my ring fingers. I tap it onto the high points of my cheekbones, the tip of my nose, and my cupid’s bow. I leave my forehead and chin matte. When I turn my head on camera, the ring light catches that ointment perfectly. It creates a stunning, glass-skin reflection. You get the healthy glow without looking like you need a shower. It’s the best trick for faking perfect skin.
14. Organizing Your Vanity for the Final Shot

The final shot needs to look aspirational. A cluttered sink kills the vibe. I used to shove all my dirty brushes out of frame. Sometimes a stray toothpaste tube would make it into the background. It was embarrassing. Now, I treat my vanity like a retail display. I bought clear acrylic organizers at Costco for $29.99. I arrange my products by height, with the tallest in the back. I make sure every label is facing forward. I wipe down the bottles with a damp cloth so there are no greasy fingerprints. I line up my serums, creams, and toners in a perfect row. I leave 1 inch of space between each product so it doesn’t look crowded. This makes your routine look curated and expensive. It gives your viewers that final hit of satisfaction before the video loops.
Honestly, shooting aesthetic content takes patience. You’re going to spill things, drop bottles, and mess up your lighting. But once you nail these techniques, your videos will look incredible. I’ve spent years figuring out these tricks, and they make a massive difference. Try incorporating one or two into your next routine. You’ll be shocked at how much better your footage looks. Pin this guide so you can reference it next time you’re setting up your tripod!
Frequently Asked Questions
How do I get my face cream to look thick on camera?
Use a metal palette knife instead of your fingers. Scoop out the product and drag it in a smooth, continuous motion to create sharp, dimensional edges that catch the light beautifully.
What lighting is best for skincare videos?
Diffused lighting is essential. Use a ring light or softbox, but always bounce the light off a wall or cover it with a white microfiber towel to soften the glare and blur imperfections.
How do you film water splashes without making a mess?
Skip the sink splash. Instead, use a continuous thermal water mist spray held six inches from your face and film in slow motion. It looks refreshing but keeps your floors dry.
Why does my dewy skin look greasy on video?
Applying oil all over your face reflects too much harsh light. Keep your forehead and chin matte, and only apply a tiny dab of healing ointment to the high points of your cheekbones.
