What’s Inside
- Master Diffused Lighting for Your Skincare Shoot Product Photography
- Embrace Macro Photography to Highlight Texture
- Implement Authentic Imperfection for Relatability
- Showcase Ingredients as Storytelling Props
- Utilize Reflective Surfaces for Dynamic Shots
- Adopt a Minimalist Aesthetic with Neutral Backgrounds
- Create Engaging Flat Lays in Your Skincare Shoot Product Photography
- Incorporate Smudges and Smears Artfully
- Use Clear Acrylic Blocks for Height and Modernity
- Avoid Inconsistent Lighting and Backgrounds
- Shoot at a Wide Angle for a Bold, Heroic Look
- Highlight Packaging as a Premium Differentiator
- Utilize Rim Lighting for Definition on Clear Products
- Consider Color Drenching for High Impact
Last October, I spent four hours trying to photograph a $182 bottle of SkinCeuticals C E Ferulic on my kitchen counter. The resulting glare made it look like a $4 knockoff from a gas station. Nailing your skincare product photography requires way more than just pointing an iPhone at a pretty bottle. I learned the hard way that capturing the exact texture of a 2 oz moisturizer takes specific lighting ratios, precise styling tools, and a lot of patience. If you’re tired of flat, sterile images that don’t convert, you need to rethink your entire setup. Trust me on this.
1. Master Diffused Lighting for Your Skincare Shoot Product Photography

Soft lighting is non-negotiable when you’re dealing with reflective glass. I tried this wrong for months before figuring out that bare bulbs ruin everything. I once shot a $300 bottle of Dr. Barbara Sturm’s Hyaluronic Serum under a bare studio strobe. The glass reflected the bulb perfectly, creating a harsh white hot-spot that completely obscured the brand label. You can’t fix that kind of blown-out highlight in editing.
I currently use a Godox FV150 continuous light, which costs around $249 at B&H Photo, paired with a massive 36-inch octagonal softbox. The large surface area of the softbox wraps the light around the cylindrical bottle. It creates a soft, luxurious gradient instead of a sharp glare. If you aren’t ready to buy studio strobes, you can replicate this by pushing a table directly next to a large window. I bought a set of sheer white curtains from Target for $14.99 specifically to hang over my office window during afternoon shoots. The sheer fabric acts as a massive diffuser, softening the harsh sunlight. You’ll want to place your product exactly 18 inches away from the fabric to get that premium, soft-focus look.
2. Embrace Macro Photography to Highlight Texture

Consumers buy skincare based on how they imagine it feels on their face. You won’t convey the rich, buttery density of Tatcha’s Dewy Skin Cream ($72 for a 1.7 oz jar) with a standard kit lens. I shoot all my texture swatches using a Canon 100mm f/2.8L macro lens, which runs about $899 new. The macro capability allows me to get incredibly close to the product, resolving the tiny micro-bubbles in a gel or the slight peak of a whipped moisturizer.
When I first started, I used a standard 50mm lens and cropped the image later. The result was a pixelated, grainy mess that looked like wet spackle. Last month, I was analyzing the lighting in a Sephora aisle, noticing how their overhead LEDs flatten product textures. To counter this in a studio, you need directional lighting combined with a macro lens. I position a small LED panel exactly 45 degrees to the right of the cream swatch. This raking light casts micro-shadows across the texture, while the macro lens captures the sharp contrast. I usually shoot these at an aperture of f/8 so the entire smear of cream stays in sharp focus.
3. Implement Authentic Imperfection for Relatability

The clinical, stark-white background look is dead. In 2026, buyers want to see products existing in real spaces, which means embracing a little mess. I noticed this shift last Tuesday at Whole Foods while studying the local beauty endcap. The brands that caught my eye used matte, slightly imperfect labels and lifestyle photography that didn’t look completely sterile.
I started adding intentional imperfections to my shots, like a slight lens flare or a shallow depth of field that blurs out the foreground. When shooting the Sand & Sky Australian Pink Clay Mask ($39 for a 2.1 oz jar), I intentionally left a tiny bit of dried clay on the rim of the jar. It shows that the product is actually used, not just a factory-fresh prop. I’ve found that leaving a few water droplets on a bathroom tile or allowing a shadow to fall naturally across the frame makes the image feel grounded. Don’t over-clean your styling surfaces to the point of looking like a hospital room. A little bit of organized chaos makes the brand feel approachable.

Clear Acrylic Makeup Organizers for Vanity,Countertop
Honestly, Clear Acrylic Makeup Organizers for Vanity surprised me — sturdier than it looks in the photos, and over 208 buyers gave it 4.5 stars.
4. Showcase Ingredients as Storytelling Props

You can’t just tell people a product has watermelon extract. You have to show them. Visual ingredient cues help buyers instantly understand the formula before they even read the caption. I bought a $4.99 personal watermelon at Trader Joe’s specifically to chop up next to Glow Recipe’s Watermelon Glow Niacinamide Dew Drops ($35 for a 1.35 oz bottle). I cut the fruit into exact 1/4-inch slices and arranged them in a semi-circle around the glass bottle.
This technique requires fresh, high-quality produce. I once tried using a bruised, sad-looking avocado next to a face mask, and it made the whole formula look rotten. If you’re shooting Herbivore Botanicals’ Emerald Deep Moisture Glow Oil ($48 for 1 oz), you need crisp, vibrant greenery. I buy fresh eucalyptus sprigs from the floral department and mist them with a spray bottle right before hitting the shutter. The tiny water droplets on the leaves add a layer of freshness that translates directly to the perceived quality of the facial oil.
5. Utilize Reflective Surfaces for Dynamic Shots

Adding a reflection underneath your product creates immediate depth and makes a $15 serum look like it belongs in a luxury department store. I picked up a 12×12 inch acrylic mirror from Home Depot for $12.50, and I use it constantly for liquid products. It works exceptionally well for elegant packaging, like Fenty Skin’s Fat Water Pore-Refining Toner Serum ($34 for a 5 oz bottle). You might also like: 20 Lovely Aesthetic Night Routine Skincare for a Fresh New Look
A common mistake is using a regular glass mirror, which creates a ‘ghosting’ effect where you see a double reflection due to the thickness of the glass. I made this error during a campaign shoot last year and had to scrap 40 images. Acrylic mirrors or specialized photography reflection boards give you a crisp, single reflection. For a more organic look, I sometimes pour exactly 2 cups of distilled water into a shallow black baking pan. When you place the product in the center and gently tap the edge of the pan, you get beautiful, natural water ripples reflecting onto the bottle’s surface. You might also like: 14 Skincare Products Photography You Need to See
6. Adopt a Minimalist Aesthetic with Neutral Backgrounds

If your background is louder than your product, you’re doing it wrong. I lean heavily into minimalist, neutral tones because they let the packaging do the heavy lifting. Brands like Lernberger Stafsing excel at this, using calming bronze and beige palettes that feel incredibly premium. I buy 53-inch Savage seamless paper rolls in the shade ‘Bone’ for $35 from a local camera shop. You might also like: 20 Creative Aesthetic Korean Skincare Worth Trying This Year
When I don’t want to drag out the heavy paper rolls, I use matte poster boards. I grab $1.98 foam core boards from Walmart in shades of cream and light grey. The trick is to avoid pure, bright white unless the brand specifically demands it. Pure white can look incredibly cheap and harsh, especially on digital screens. A soft beige or warm grey absorbs the light beautifully and provides a subtle contrast to bright white cream jars or colorful serum bottles. I’ve found that keeping the background matte is crucial. Any gloss on the backdrop will compete with the shine of the skincare packaging.
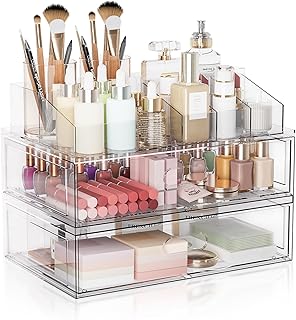
Clear Stackable Makeup Organizer with Drawer
Clear Stackable Makeup Organizer with Drawer has been one of the most consistently praised picks in this category. 310 reviewers averaged 4.5/5.
7. Create Engaging Flat Lays in Your Skincare Shoot Product Photography

I used to hate flat lays because my shadows always fell across the frame, making the image look muddy. The secret to a good flat lay is raising your camera high enough and using a C-stand to shoot perfectly parallel to the ground. When I’m building a night routine story, I’ll arrange Laneige’s Water Sleeping Mask ($32 for a 2.3 oz jar) alongside a silk eye mask and a small succulent. I bought a 3-pack of faux succulents from Costco for $12.99, and they add just enough green texture without wilting under hot studio lights.
Composition is everything here. I space my items exactly 2 inches apart to give the layout breathing room. If you crowd the products, it looks like a cluttered bathroom drawer rather than a curated routine. I also use small pieces of sticky tack underneath cylindrical bottles to stop them from rolling around on the background paper. There’s nothing worse than getting your composition perfect, only to have a lip balm roll out of frame right as you take the photo. No exaggeration.
8. Incorporate Smudges and Smears Artfully

A perfectly executed product swatch is an art form. You can’t just stick your finger in a jar and wipe it on a board. I scoop exactly 1/2 teaspoon of Kiehl’s Ultra Facial Cream ($39 for a 1.7 oz jar) using a stainless steel lab spatula. The metal edge allows me to create a smooth, sweeping curve that catches the light perfectly.
For thinner liquids, like The Ordinary’s Hyaluronic Acid 2% + B5 ($9.60 for a 1 oz bottle), I use a glass dropper to place three precise droplets onto a clear acrylic board. I learned early on that if you try to smear a watery serum, it just looks like a wet stain. You have to let it bead up. I keep a $4 pack of wooden cuticle pushers on my desk to gently shape the edges of thick cream swatches. If a smear looks too jagged, I wipe the board clean with rubbing alcohol and start over. It usually takes me six or seven attempts to get a swatch that looks both organic and visually pleasing.
9. Use Clear Acrylic Blocks for Height and Modernity

Small products get lost easily on a flat surface. When I’m shooting something tiny like Glossier’s Balm Dotcom ($14 for a 0.5 oz tube), I need to lift it off the ground to give it presence. I ordered a 4-piece set of solid acrylic cylinder blocks off Amazon for $18.99, and they instantly modernized my portfolio.
The clear acrylic adds a geometric element without introducing a distracting color. I usually stack a 2-inch block next to a 4-inch block to create varied heights. One massive mistake I see is people using scratched acrylic. Because the blocks are clear, the camera picks up every single scuff mark and dust particle inside the plastic. I polish my acrylic risers with a specialized plastic cleaner before every single shoot. If you place a frosted glass serum bottle on top of a pristine, polished acrylic cylinder, the light passes through both materials, creating a glowing, high-end effect that looks incredibly expensive.

6Pcs Jade Roller for Face
6Pcs Jade Roller for Face punches above its price — 29 buyers rated it 4.5 stars. I would buy it again.
10. Avoid Inconsistent Lighting and Backgrounds

Nothing destroys a brand’s visual identity faster than a mismatched product grid. I reviewed a skincare catalog last month where the 4 oz cleanser was shot in cool, blue daylight, but the 2 oz moisturizer right next to it had a warm, yellow indoor cast. It looked like two different companies made the products. You have to lock down your color temperature.
I set my camera’s white balance manually to exactly 5600K for every studio shot. I don’t rely on auto white balance because it shifts depending on the color of the bottle. If I’m shooting a green bottle, the camera tries to compensate by adding magenta, which ruins the neutral beige background. I also measure the exact distance from my light source to the product—usually 24 inches—and mark the floor with tape. If you move the light between shots, the shadow angles change, and the images won’t look cohesive when placed side-by-side on a website. Consistency requires strict, boring documentation of your setup.
11. Shoot at a Wide Angle for a Bold, Heroic Look

Most people shoot small products at 50mm or 85mm to keep the lines perfectly straight. That’s safe, but it can be boring. I tried twisting my Sigma lens down to 24mm while photographing Byoma’s Brightening Serum ($15.99 for a 1.01 oz bottle), and the result was surprisingly aggressive. When you get a wide-angle lens very close to a product and shoot slightly upward, it creates a ‘hero’ angle. The bottle looms over the camera, making it look massive and important.
You have to be careful with this technique because wide angles distort shapes. A round jar might stretch into an oval if you place it too close to the edge of the frame. I keep the product dead center where the distortion is minimal. This bold perspective works brilliantly for colorful, youth-oriented brands that want to break away from the traditional, passive skincare aesthetic. It gives a $15 drugstore serum the visual weight of a prestige product.
12. Highlight Packaging as a Premium Differentiator

If a brand spends money on custom packaging, your photography needs to prove it. I love shooting Urang’s frosted glass bottles because the material diffuses light beautifully. But premium materials show flaws instantly. I keep a 6-pack of $5.99 microfiber cloths from Target in my camera bag because dust and fingerprints are the enemy of premium packaging.
I wipe every single bottle down meticulously before pressing the shutter. I learned this lesson after spending three hours editing out thumbprints from a glossy black Isamaya Beauty compact. It’s infinitely faster to clean the physical product than to fix it in Photoshop. I also pay close attention to the pump mechanism and the cap. I make sure the nozzle is facing perfectly forward and that there isn’t a crusty rim of dried lotion around the dispenser. Buyers notice these micro-details. A clean, sharp image of a heavy glass bottle with a perfectly aligned cap signals quality before the customer even reads the ingredients list.

Vtopmart 3 Tier Clear Makeup Organizer with Drawer
A dependable everyday pick — Vtopmart 3 Tier Clear Makeup Organizer with Drawer pulls in 2 ratings at 4.5 stars. Not flashy, just solid.
13. Utilize Rim Lighting for Definition on Clear Products

Clear bottles look dead if you light them exclusively from the front. The light just passes straight through the liquid, leaving the edges dark and muddy. When I shoot Dermalogica’s Special Cleansing Gel ($44 for an 8.4 oz bottle), I use a technique called rim lighting. I place a narrow strip softbox slightly behind the bottle, angled toward the camera.
This backlighting catches the edges of the clear plastic, creating a glowing, white outline that defines the shape of the bottle against the background. It also illuminates the gel inside, making it look bright and viscous rather than dull. I struggled with clear packaging for years, often ending up with flat images where the bottle blended into the white background. Adding that rear light separates the product from the backdrop and gives it a three-dimensional quality. You just have to use a piece of black foam board just off-camera to flag the light so it doesn’t flare directly into your lens.
14. Consider Color Drenching for High Impact

Monochrome sets are a massive trend right now. Instead of using a neutral background, you match the environment exactly to the product’s primary color. I bought three yards of lavender silk fabric from Joann for $22 to match a purple Tatcha bottle, and the resulting image was incredibly striking. It creates a feeling of richness and total immersion.
Fenty Skin’s purple-toned bottles look incredible when shot on a matching purple acrylic board with a purple paper backdrop. The trick is to ensure the shades aren’t clashing. If the bottle is a cool-toned lilac and your background is a warm-toned plum, it looks like a mistake. I take the physical bottle into the craft store with me to ensure a perfect match. When the colors are identical, the viewer’s eye is forced to focus entirely on the texture of the product and the typography on the label, rather than bouncing between contrasting colors.
Upgrading your visual content doesn’t require a $10,000 studio buildout. I’ve shot some of my highest-converting images using a $15 Target curtain and a piece of foam board. Start by mastering one lighting setup before buying a bunch of expensive props. I highly recommend picking up a basic acrylic riser set and practicing your flat lay spacing this weekend. If you found these technical breakdowns helpful, pin this article to your photography mood board so you can reference the exact measurements and lighting angles during your next shoot.
Frequently Asked Questions
What lighting is best for skincare shoot product photography?
Soft, diffused lighting works best. I use a Godox FV150 with a large softbox to eliminate harsh glare on glass bottles and reflective plastic packaging. You can also use sheer curtains over a window.
How do you photograph clear skincare serums?
You need rim lighting. Place a light source slightly behind the clear bottle to illuminate the edges. This defines the shape and highlights the liquid texture inside, preventing it from looking flat.
What lens should I use for skincare textures?
A 100mm macro lens is ideal for capturing the thick consistency of creams or the micro-bubbles in a gel. It provides the sharp detail necessary for close-up texture shots without pixelation.
How do I avoid fingerprints on skincare bottles?
I wipe every single bottle down with a dry microfiber cloth right before pressing the shutter. Even slightly oily fingers will leave marks that look terrible under bright studio strobes.
