What’s Inside
- Master Soft, Diffused Lighting with Beauty Dishes
- Embrace Macro Lenses for Intricate Details
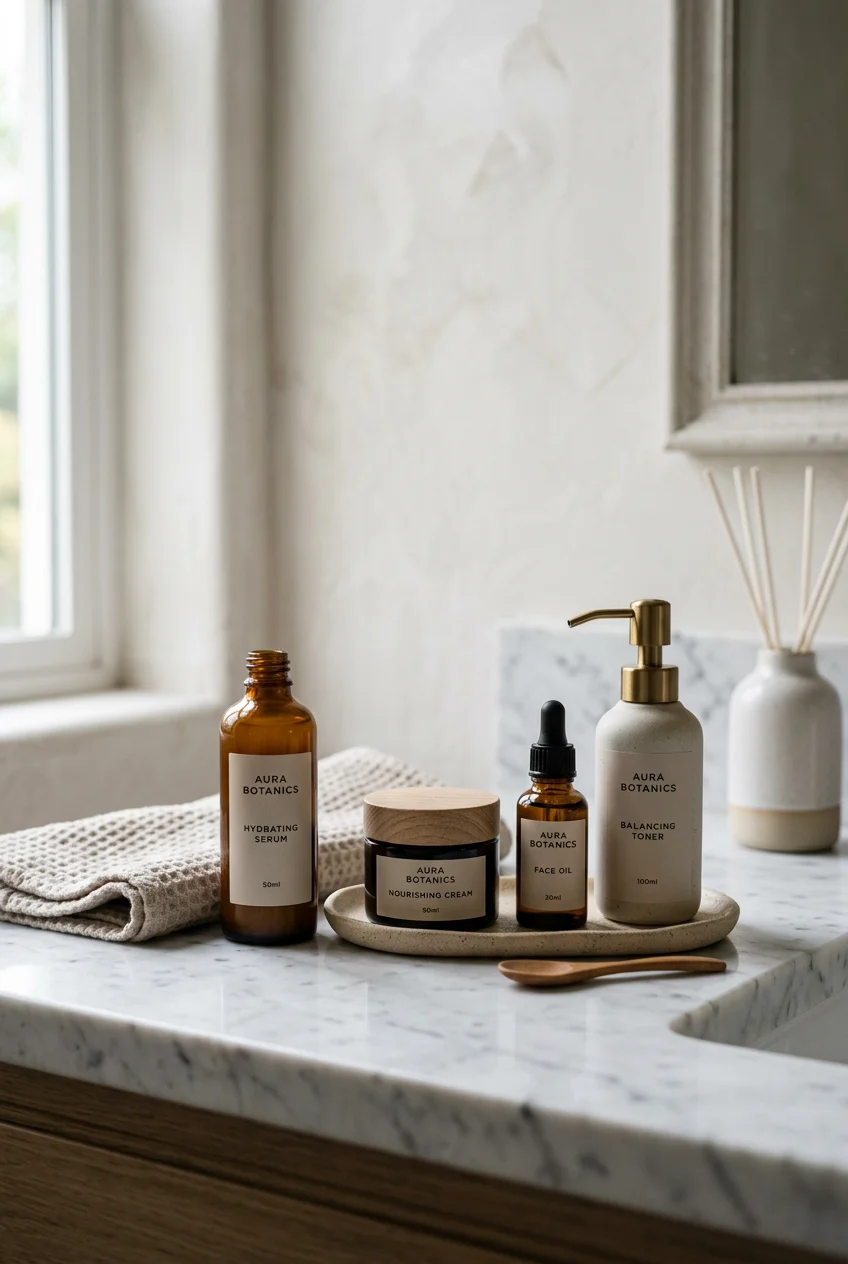
- Adopt a Minimalist Background for Sophistication
- Integrate Key Ingredients as Visual Props
- Optimize Camera Settings for True Color
- Experiment with Dynamic Angles and Flat Lays
- Control Glare on Glossy Packaging
- Showcase Texture with Creative Smudges
- Curate Your Skincare Products Photography Aesthetic Props
- Create Storytelling Lifestyle Imagery
- Incorporate Water for Freshness and Hydration
- Editing Your Skincare Products Photography Aesthetic
Last Tuesday at Target, I spent twenty minutes trying to photograph a shiny $14.99 bottle of Versed serum on an endcap. I realized my reflection was perfectly mirrored in the glass, holding a half-eaten pretzel. Nailing a true skincare products photography aesthetic takes more than just pointing your phone at a bottle near a window. Most of my early attempts looked like blurry hostage photos of moisturizer. I’ve ruined enough expensive serums and melted enough lip balms to know what actually works. Let’s fix your setup with techniques that yield sharp, professional results.
1. Master Soft, Diffused Lighting with Beauty Dishes

Start with lighting. A beauty dish at a 45-degree angle to your product creates soft, diffused light that highlights texture without harsh shadows. A decent beauty dish runs between $50 and $200. I bought a $65 Neewer dish on Amazon last month. Before this, I tried using a cheap ring light from Walmart. It left terrible white circles reflecting on every glossy bottle. Position the dish to the side and slightly above the product. This works well for rich moisturizers where you want to show creamy peaks. I tested this on a 1.7 oz jar of Tatcha The Dewy Skin Cream ($72). The 45-degree angle caught the slight lavender tint of the cream perfectly. If you’re shooting a delicate serum in a glass dropper, the diffused light wraps around the cylinder instead of blowing out the highlights. Keep the light source about two feet away. You don’t want to melt the product. I left a $34 Laneige Lip Sleeping Mask (0.7 oz) under a hot continuous light for twenty minutes once, and it turned into a puddle of pink liquid. Learned that the hard way. Use LED lights that stay cool.
2. Embrace Macro Lenses for Intricate Details

Get closer than you think. Using a macro lens or a $15 set of extension tubes lets you capture extreme close-ups of product textures and unique formulations. This is a massive trend for 2026. Customers want to see the literal granules before they buy an exfoliant. I use a 100mm macro lens to shoot the fine purple granules of the Tatcha Rice Polish Foaming Enzyme Powder ($68 for 2.1 oz). At 1:1 magnification, the powder looks like crushed amethyst. I also shot the delicate air bubbles suspended inside a 1.69 oz bottle of Drunk Elephant B-Hydra Intensive Hydration Serum ($49). You can’t capture that level of detail with a standard kit lens. I tried doing this with my phone camera at Whole Foods last week. I was hovering over a $19.99 bottle of Acure Radically Rejuvenating Whipped Night Cream. The phone blurred the background into a muddy mess and couldn’t focus on the cream’s texture. A real macro lens gives you optical clarity. Set your camera on a heavy tripod. Even a slight breath will throw a macro shot out of focus. I use a 2-second timer delay so pressing the shutter button doesn’t shake the camera.
3. Adopt a Minimalist Background for Sophistication

Skip the busy backgrounds. Focus on clean lines and simple backdrops like plain white, soft pastel, or neutral-toned gradients. This makes the product the undisputed star. Brands like The Ordinary use stark white backgrounds to emphasize their clinical packaging. I bought a $9.80 bottle of The Ordinary Niacinamide 10% + Zinc 1% (1 oz) at Ulta to practice this. I placed it on a $3 piece of white foam core from Target. The stark contrast makes the dropper and minimalist text pop. It reduces visual noise and directs attention to the product’s selling points. I used to use floral contact paper from Dollar Tree. It looked cheap and distracted from the skincare. A simple light grey or beige gradient paper roll costs maybe $15 and lasts for months. When I shot a 2.5 oz tube of La Roche-Posay Toleriane Double Repair Face Moisturizer ($23.99), the white background made the blue square logo stand out. Keep the surface free of dust. At f/11 on a white background, every speck of lint shows up. I keep a can of compressed air nearby to blast the surface right before shooting.

Clear Acrylic Makeup Organizers for Vanity,Countertop
If you want something that just works, Clear Acrylic Makeup Organizers for Vanity is a safe bet (208 reviews, 4.5 stars).
4. Integrate Key Ingredients as Visual Props

Arrange the product’s core ingredients around the bottle for a cohesive composition. This gives a visual cue about what’s inside. I bought a 0.5 oz jar of Glow Recipe Avocado Melt Retinol Eye Cream ($42) and sliced up half a fresh avocado to place next to it. The bright green fruit matched the jar perfectly. I picked up the avocado at Sprouts for $1.50. You have to work fast with fresh produce. The avocado started browning after ten minutes under the studio lights, ruining the shot. I also tried this with an 8.4 oz bottle of Fresh Rose Deep Hydration Facial Toner ($48). I scattered real pink rose petals around the base. Ensure your props are subtle. They should reinforce the benefits without distracting from the actual product. I once piled way too many coffee beans around a $20 Frank Body Original Coffee Scrub (7.05 oz). You couldn’t read the label because the beans were blocking the text. Less is definitely more. Cut the fruit into precise 1/4-inch slices for a clean look. If you’re shooting a vitamin C serum, use a single, perfectly cut orange wedge.
5. Optimize Camera Settings for True Color

Auto settings ruin product photos. For maximum sharpness, use a narrow aperture between f/8 and f/11. If you need extensive depth of field to keep a long bottle in focus, push it to f/16 or f/22. Keep your ISO as low as possible. I always shoot at ISO 100 or 200 to minimize digital noise. Crucially, set a custom white balance using a grey card before you start. Relying on auto white balance is a massive mistake. I spent an hour photographing a 1.7 oz jar of Biossance Squalane + Omega Repair Cream ($60) under warm lights. The camera auto-corrected the white jar to a sickly yellow. I had to trash the entire batch. A grey card costs $8 on Amazon. You take one photo of it under your lighting, tell your camera to use that as the reference, and your colors stay true. This matters immensely in skincare. If a $38 Sunday Riley Good Genes All-In-One Lactic Acid Treatment (1 oz) looks orange instead of pale yellow, buyers will think it’s oxidized and expired. Always use a tripod when shooting at f/16. The narrow aperture requires a slower shutter speed, and holding the camera by hand guarantees a blurry photo.
6. Experiment with Dynamic Angles and Flat Lays

Stop shooting everything straight on. Move your camera to find angles that highlight the dimensions of the packaging. Use a low angle to make prestige skincare products appear larger than life. I placed a 1.7 oz bottle of La Mer The Concentrate ($425) on a small acrylic block and shot it from slightly below. It made the green glass bottle look like a monument. For everyday products, angled shots between 25 and 75 degrees show off both the front label and the depth of the cap. Flat lays offer a clean, overhead view. I arranged a whole routine of CeraVe products, including their 16 oz Hydrating Facial Cleanser ($17.99), on a blue background. Getting the camera perfectly parallel to the floor is tricky. I use a tripod with a horizontal arm extension. I tried taping my phone to a mic stand once to get a flat lay. The phone fell and cracked the screen of my iPad. Never rig equipment over glass bottles without proper counterweights. When shooting from a 45-degree angle, make sure the brand name is legible and not distorted by the curve of the bottle.

Masirs Clear Makeup Organizer
Honestly, Masirs Clear Makeup Organizer – 16-Compartment Cosmetic and Jewelry Ho surprised me — sturdier than it looks in the photos, and over 258 buyers gave it 4.5 stars.
7. Control Glare on Glossy Packaging

Glossy jars are a nightmare to photograph. A common mistake is allowing harsh reflections and glare to obscure the label. To combat this, adjust your light source angles and use diffuser panels. Position your main light to the left-back side of the product. Then, place a white bounce board in front to subtly illuminate the labels without creating a direct glare spot. I struggled with this when shooting a 1 oz bottle of Paula’s Choice 2% BHA Liquid Exfoliant ($35). The dark grey plastic bottle is incredibly shiny. Every light in my room reflected off it. I eventually taped a piece of white parchment paper over my desk lamp to diffuse the light, and held a $1 white poster board from Kroger just out of frame to bounce soft light onto the text. It took me twenty minutes of micro-adjustments to find the exact angle where the glare disappeared. If you’re shooting a glass dropper bottle, watch out for the reflection of your own hands or camera. I wear a black long-sleeve shirt and use a black piece of cardboard with a hole cut out for the lens to block my reflection. You might also like: 11 Night Skincare Routine Worth Trying
8. Showcase Texture with Creative Smudges

Buyers want to know how a product feels before they spend money. Create appealing smudges, smears, or swatches on a clear acrylic surface to highlight the color and consistency. A creamy smear of Kiehl’s Ultra Facial Cream ($39 for 1.7 oz) evokes a strong sensory appeal. I use a small metal palette knife to scoop exactly 1/2 teaspoon of cream and drag it across a glass plate. The trick is applying uneven pressure to create thick and thin areas, showing the opacity. For liquids, a serum drop suspended mid-slide works beautifully. I placed three drops of a $22 COSRX Advanced Snail 96 Mucin Power Essence (3.38 oz) on an angled piece of acrylic. The thick, stringy texture caught the light perfectly as it slowly dripped down. You need to shoot fast before it completely runs off the edge. I ruined a wood table doing this because I didn’t put a catch tray underneath. The essence soaked right into the finish. Use a glass dropper for precise application. Don’t just squirt it from the bottle. A controlled 1/4 inch drop looks deliberate, while a messy puddle looks like a spill. You might also like: 15 Creative Aesthetic Rhode Skincare to Transform Your Space
9. Curate Your Skincare Products Photography Aesthetic Props

Choose props and backdrops that actually align with the brand’s identity. This is where a true skincare products photography aesthetic comes together. For an eco-conscious brand, incorporate earthy tones, wooden elements, fresh leaves, or smooth river stones. I styled a 2 oz jar of Youth To The People Superfood Air-Whip Moisture Cream ($48) on a rough piece of slate I found at a landscaping supply store for $4. I added a sprig of fresh kale from Costco. It matched the green branding perfectly. For a luxurious aesthetic, glass or acrylic blocks provide clean, modern lines. I bought a set of clear acrylic risers on Amazon for $24. They make a $135 bottle of SkinCeuticals C E Ferulic (1 oz) look like it belongs in a high-end spa. Trending in 2026 are earthy backdrops with textured elegance. I tried using a piece of burlap once for a rustic look, but the loose fibers got stuck in the lip balm I was shooting. Stick to hard, cleanable textures like stone, wood, or frosted acrylic. If you’re shooting a vibrant ingredient line, use colorful props for visual impact, but keep them within the product’s color palette. You might also like: 14 Skincare Products Photography You Need to See

Yeamon Gua Sha Facial Tools and Face Roller Set
Honestly, Yeamon Gua Sha Facial Tools and Face Roller Set surprised me — sturdier than it looks in the photos, and over 11 buyers gave it 4.5 stars.
10. Create Storytelling Lifestyle Imagery

Static product shots get boring. Integrate lifestyle elements that show the product in use or within a relatable setting. A beautifully styled vanity or a serene bathroom edge adds context. I photographed a 2.25 oz tube of Summer Fridays Jet Lag Mask ($49) next to a steaming cup of chamomile tea, bathed in harsh morning sunlight from my bedroom window. It sells the idea of a Sunday morning self-care ritual. To get the steam to show up on camera, I microwaved a wet cotton ball and hid it behind the teacup. Real tea stops steaming after two minutes. I set up a shot for a 6.7 oz bottle of Bioderma Sensibio H2O Micellar Water ($18.99) on my bathroom sink next to some folded white washcloths. The problem was my bathroom mirror reflected the toilet in the background. I had to rearrange the angle to hide it. Always check your background reflections. Buyers don’t want to see your dirty laundry basket in the reflection of their luxury face wash. Use props that make sense for the specific step in the routine. A night cream belongs next to a silk sleep mask, not a pair of sunglasses.
11. Incorporate Water for Freshness and Hydration

Water elements emphasize hydrating benefits and create a refreshing visual. Utilize water splashes, delicate droplets, or subtle reflections. You can achieve this with a continuous fine mist spray bottle. I sprayed a light layer of water over a 1 oz bottle of The Ordinary Hyaluronic Acid 2% + B5 ($9.60) to make it look chilled and hydrating. The tiny droplets clung to the matte glass perfectly. You can also try capturing a drop of serum mid-air as it falls. I set my camera to a fast shutter speed of 1/1000th of a second and used an eyedropper to release the liquid. It took me forty-five attempts to get one clear shot of the drop hitting the surface. My entire floor was covered in sticky serum by the end of it. Put down a large plastic tarp before you try any splash photography. I also tried dropping a $28 bottle of Laneige Water Bank Blue Hyaluronic Cream Moisturizer (1.69 oz) into a small glass tank of water. The jar floated unevenly and the label peeled off after three minutes. If you’re submerging products, make sure the packaging is waterproof first.
12. Editing Your Skincare Products Photography Aesthetic

The raw photo is only half the work. Nailing the final skincare products photography aesthetic happens in Lightroom or Photoshop. I always start by adjusting the white balance to ensure the background is pure white or a deliberate, clean tone. Then, I use the healing brush tool to remove every speck of dust. I spent twenty minutes zooming in at 400% on a photo of a 0.5 oz jar of Clinique Moisture Surge Eye 96-Hour Hydro-Filler Concentrate ($39) just clicking on tiny white lint particles. It’s tedious, but leaving dust on the jar makes the brand look cheap. Buyers aren’t going to trust a brand with dusty product photos. I bump up the clarity slider slightly, around +10, to make the text on the label sharper. Don’t overdo the saturation. If you push the colors too far, the product looks radioactive. I once cranked the saturation on a $24 Glossier Milky Jelly Cleanser (6 oz) and the soft pink bottle turned neon magenta. It looked ridiculous. Finally, I use the dodge tool to subtly brighten the left side of the bottle, enhancing the 3D cylindrical shape. Keep the edits clean and realistic. The goal is a polished version of reality, not a heavily filtered digital painting.
Figuring out product photography takes patience and a lot of trial and error. I still occasionally mess up a white balance or drop a heavy glass bottle on my backdrop. Start with a single light source and a cheap bounce board before buying expensive gear. Grab a bottle from your vanity tonight and practice finding that perfect 45-degree angle. Save this guide to your photography Pinterest board for the next time you’re setting up a shoot, and let me know which texture swatch technique works best for you. Trust me on this.

EQQUALBERRY Vitamin Illuminating Serum | Niacinamide 4% +
Honestly, EQQUALBERRY Vitamin Illuminating Serum | Niacinamide 4% + Brightening surprised me — sturdier than it looks in the photos, and over 112 buyers gave it 4.5 stars.
Frequently Asked Questions
How do I avoid glare on glossy skincare bottles?
Position your main light source behind and to the left of the product. Use a white bounce board in front to reflect soft light onto the label without creating a direct reflection.
What camera settings are best for product photography?
Shoot with a narrow aperture between f/8 and f/11 for maximum sharpness. Keep your ISO at 100 or 200 to reduce digital noise, and always set a custom white balance using a grey card.
How do you photograph skincare textures?
Use a macro lens and a small metal palette knife to create controlled smudges on a clear acrylic surface. This highlights the opacity and consistency of creams and serums.
What is the minimalist skincare photography aesthetic?
It involves using clean lines and stark backdrops like plain white or light grey foam core. This reduces visual noise and forces the viewer’s attention directly onto the product’s packaging and formula.
