What’s Inside
- Master Soft Diffused Lighting for Your Skincare Asthetic Picture
- Use Clear Acrylic Risers for Instant Depth
- Fake Fresh Water Splashes with Glycerin
- Choose Heavy, Authentic Background Textures
- Master the Metal Spatula Smear
- Use Muted Botanicals, Not Bright Flowers
- Clean Your Mirrors Obsessively
- Invest in a Clip-On Macro Lens
- Stick to Monochromatic Color Palettes
- Use a Ruler for Your Flat Lay Grids
- Prep Your Hands Like a Hand Model
- Create Fake Window Shadows with Cardboard
- Stop Over-Editing with Orange Presets
Last Tuesday at Target, I tried snapping a quick photo of my cart filled with new glass dropper bottles. The harsh fluorescent lights bounced right off the glass, making my favorite $14.99 1 oz Versed serum look like a greasy puddle of dish soap. If you want a perfect skincare aesthetic picture, you can’t just point your phone and shoot. I learned that the hard way after wasting entire weekends trying to make my bathroom counter look like a professional Pinterest board. The reflections were awful. The textures looked flat. I’m embarrassed to admit how many photos I’ve deleted. Let’s fix your lighting, props, and angles so your photos actually look expensive. I’ve spent months testing weird props and cheap lighting hacks. Some worked beautifully. Others were complete disasters. I’m breaking down exactly what you need to buy, down to the exact dollar amount, to get those glossy, flawless shots.
1. Master Soft Diffused Lighting for Your Skincare Asthetic Picture

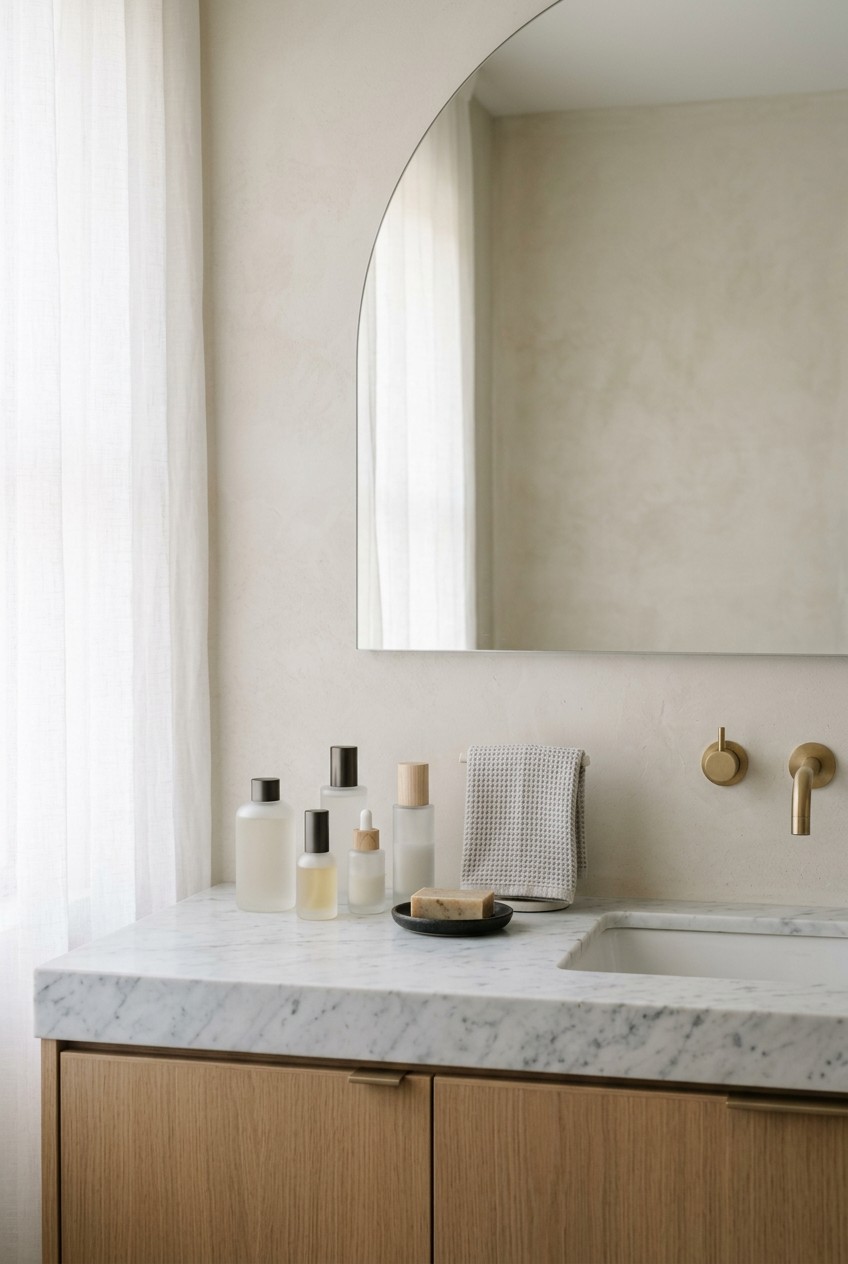
I used to think cheap ring lights were the secret to a great skincare aesthetic picture. I was so wrong. My photos looked flat and cheap. I tried using a $19.99 10-inch ring light from Walmart, and it just left these ugly, harsh white circles on all my glossy moisturizer tubs. If you want stunning results, you need soft, diffused lighting. I personally swear by the Godox FV150. It costs about $289.00, but it completely changes how light wraps around glass bottles. You pair it with a 32-inch diffuser panel. If you don’t have the budget for professional gear, just use a sheer white curtain from Target. I bought a 2-panel set of Room Essentials sheer curtains for exactly $9.00. I hung them over my bedroom window last month. I placed a 4 oz glass bottle of Heritage Store Rosewater ($11.49) on a white table right next to the window. The curtain softens the harsh sunlight perfectly. It stops the blinding glare from ruining the label. Most people get this wrong. They blast their products with direct sunlight. It just creates harsh, ugly black shadows. You want the light to look like a soft, glowing cloud. It makes the liquid inside the bottles look incredibly inviting and clear.
2. Use Clear Acrylic Risers for Instant Depth

Stacking products flat on a table is incredibly boring. I spent an entire Saturday afternoon last month trying to arrange five different serums on my bathroom counter. It looked like a cluttered, confusing mess. I finally drove to The Container Store and bought a 3-tier clear acrylic riser for $14.99. It measures exactly 9 by 6 inches. This simple piece of plastic completely fixed my composition. You place your tallest items in the back and the smallest jars in the front. I put my 8 oz bottle of Paula’s Choice 2% BHA Liquid Exfoliant ($34.00) on the top tier. Then I placed a tiny 0.5 oz jar of Kiehl’s Creamy Eye Treatment with Avocado ($38.00) on the bottom step. The acrylic is totally invisible on camera. It makes the products look like they’re magically floating. I tried using cheap cardboard boxes covered in a white towel once. Don’t do this. It looked incredibly lumpy and cast weird fuzzy shadows. Acrylic gives you clean, sharp lines. You can also find cheaper acrylic blocks at Sprouts in their home goods aisle sometimes. A 2-inch solid acrylic cube costs about $5.99 there. It adds perfect dimension to any flat lay photo.
3. Fake Fresh Water Splashes with Glycerin

Plain dry bottles are fine, but they lack energy. I wanted to show off the hydrating power of a new hyaluronic acid serum. I tried splashing regular tap water on a 1 oz bottle of The Ordinary Hyaluronic Acid 2% + B5 ($8.90). The water just ran right off the glass and made a giant, ugly puddle on my backdrop. It was a complete disaster. The secret to those perfect, frozen water droplets is glycerin. I picked up a 4 oz bottle of NOW Solutions Vegetable Glycerine for $7.99 at Whole Foods. You mix exactly 2 tablespoons of glycerin with 2 tablespoons of water in a tiny 2 oz continuous spray bottle. I bought a cheap plastic mister from Kroger for $2.49. You spray this thick mixture directly onto your glass bottles. The glycerin makes the water sticky. The droplets literally sit perfectly still on the glass for hours. They catch the light beautifully. It makes the product look fresh and incredibly hydrating. I sprayed this on a green 5 oz tube of COSRX Low pH Good Morning Gel Cleanser ($14.00). The little beads of moisture made the plastic tube look like it was sitting in a dewy rainforest.

EQQUALBERRY Vitamin Illuminating Serum | Niacinamide 4% +
If you want something that just works, EQQUALBERRY Vitamin Illuminating Serum | Niacinamide 4% + Brightening is a safe bet (101 reviews, 4.5 stars).
4. Choose Heavy, Authentic Background Textures

Your background can ruin everything. I used to shoot on my dark brown granite kitchen counter. It absorbed all the light and made my photos look muddy and gross. You need light, reflective textures. I went to a local fabric store and bought a half yard of pure white raw silk for $18.50. The texture is slightly bumpy but has a gorgeous soft sheen. It bounces light perfectly back onto the products. If you prefer a hard surface, skip the cheap sticky paper. I tried covering a board in a $6.99 marble contact paper roll from Target. It bubbled up immediately and looked totally fake on camera. Instead, go to Home Depot. Buy a single 12 by 24 inch real Carrara marble floor tile. It costs exactly $8.98. It’s heavy, cold, and looks incredibly expensive. I place my 1.7 oz jar of Tatcha The Dewy Skin Cream ($72.00) right on the cold marble. The purple jar pops against the white and gray stone. The heavy tile stays perfectly flat. You don’t have to worry about wrinkles or weird reflections. It gives you a clean, high-end studio look for under ten bucks. You might also like: 20 Gorgeous Acne Skincare Routine for Any Style
5. Master the Metal Spatula Smear

People want to see what the cream actually looks like. Leaving it hidden inside the jar is a huge missed opportunity. I used to just dip my finger in and smear it on the back of my hand. It looked messy and unappealing. My hands are usually dry, so my textured skin distracted from the actual product. You need to do a hard surface smear. I bought a 4-inch stainless steel makeup mixing spatula for $5.99 on Amazon. I scoop out exactly 1/2 teaspoon of product. Let’s use the 1.7 oz Laneige Water Sleeping Mask ($32.00) as an example. It has this gorgeous blue gel texture. I drop the gel onto a clear piece of acrylic. Then I take the flat edge of the metal spatula and pull it straight down in one smooth, firm motion. It creates a perfect, translucent ribbon of product. You can see every little air bubble and the exact thickness of the gel. I tried doing this with a cheap plastic spoon once. The plastic dragged and left ugly, jagged ridges in the cream. You need the cold, sharp edge of metal. It makes the texture look incredibly satisfying and professional. You might also like: 15 Brilliant Skincare Routine Ideas That Make a Real Difference
6. Use Muted Botanicals, Not Bright Flowers

Adding plants brings a dead photo to life. But you have to be very careful. I bought a massive bouquet of bright pink lilies from Costco for $14.99. I shoved them behind a 1 oz bottle of Biossance Squalane + Vitamin C Rose Oil ($74.00). The giant pink flowers completely overpowered the delicate pink bottle. The photo looked like a florist advertisement, not a skincare shot. The trick is using minimal, muted greens. I always grab a bunch of fresh Silver Dollar Eucalyptus from Trader Joe’s. It costs exactly $3.99 for a generous bundle. The dusty green leaves perfectly complement almost any packaging. I snip off just two or three small leaves. I place them casually next to a 5.4 oz bottle of Naturium Niacinamide Cleansing Gelée ($17.99). The green adds a pop of life without stealing the focus. You can also use single, plain petals. I ripped a single white petal off a $5.99 Trader Joe’s white rose. I laid it right next to a dab of eye cream. It adds a soft, organic shape to all the harsh geometric lines of bottles and jars. Less is always more with plants. You might also like: 20 Charming Aesthetic Videos Night Routine Skincare You’ll Want to Bookmark

6Pcs Jade Roller for Face
6Pcs Jade Roller for Face punches above its price — 28 buyers rated it 4.5 stars. I would buy it again.
7. Clean Your Mirrors Obsessively

Mirrors are tricky but amazing. I spent an entire Sunday morning trying to shoot a mirror reflection flat lay. I used a dirty bathroom mirror. The camera picked up every single speck of dust and dried toothpaste. It was absolutely disgusting. If you want a striking photo using reflections, you need a brand new, frameless mirror. I picked up a 12-inch round frameless mirror tray from Target for $15.00. Before you shoot, you must clean it obsessively. I use a 23 oz bottle of Windex ($3.98) and a microfiber cloth. Paper towels leave tiny white lint fibers everywhere, and your camera will see them all. I lay the clean mirror flat on a table near a window. I place a 1 oz glass dropper bottle of Glow Recipe Watermelon Glow Niacinamide Dew Drops ($35.00) right in the center. You shoot from a low angle. The pink bottle reflects perfectly in the glass. It doubles the visual impact of the product. The background reflects the sky or a white ceiling. It creates this endless, dreamy space. Just make sure you aren’t wearing a bright red shirt while shooting. I did that once, and the mirror caught my red reflection, tinting the whole photo a weird pink.
8. Invest in a Clip-On Macro Lens

Standard phone cameras just can’t capture the tiny details of a physical exfoliant. I tried zooming in on a scoop of the 2 oz Dermalogica Daily Microfoliant ($65.00). My iPhone just turned it into a blurry white blob. You couldn’t see the fine powder texture at all. I finally invested in a Xenvo Pro Lens Kit for $39.99. It clips right over your phone camera. It comes with a 15x macro lens. I poured exactly 1/4 teaspoon of the white powder onto a dark piece of slate I found at a craft store for $4.50. I brought the macro lens about one inch away from the powder. The resulting photo was incredible. You could see every single grain of rice bran extract. It looked like tiny, perfect white sand. This works beautifully for thick creams too. I shot a macro photo of the 1.7 oz First Aid Beauty Ultra Repair Cream ($38.00). The macro lens captured the dense, whipped texture perfectly. It makes the viewer feel like they can reach through the screen and touch the product. Just hold your breath when you shoot. The slightest hand movement will completely ruin a macro shot.
9. Stick to Monochromatic Color Palettes

Throwing random colors together looks chaotic. I once tried to photograph a bright yellow 1.7 oz Sunday Riley C.E.O. Vitamin C Rich Hydration Cream ($65.00) next to a dark blue bottle of midnight serum. It clashed horribly. The photo literally gave me a headache. You need a strict color palette. Monochromatic is the easiest way to look professional. If I’m shooting the 5 oz CeraVe Hydrating Facial Cleanser ($14.99) with its iconic green and white pump, I stick to those exact colors. I use a pure white background. I add a tiny sprig of green mint from my garden. I might place a light green 2-inch ceramic dish from Target ($3.00) in the corner. The whole image feels cohesive and calming. If you have a pink product, like the 0.5 oz Laneige Lip Sleeping Mask in Berry ($24.00), use soft pink props. I bought a 12-inch square of pink felt from a craft store for $0.49. I used it as a soft, fuzzy background. The matching tones make the image feel intentional and expensive. Don’t mix warm and cool tones unless you really know what you’re doing.

Eclat Skincare Vitamin C Serum – Skin Care for Dark Spots
If you want something that just works, Eclat Skincare Vitamin C Serum – Skin Care for Dark Spots is a safe bet (753 reviews, 4.5 stars).
10. Use a Ruler for Your Flat Lay Grids

Flat lays are much harder than they look. I tried making one last year by just dumping all my morning routine products on my bed. The blankets were wrinkled, and the round bottles kept rolling over. It was a disaster. You need a hard, perfectly flat surface. I use a 20 by 30 inch white foam core board from Walmart. It costs exactly $3.24. You have to treat the board like a strict grid. I place a 5 oz bottle of La Roche-Posay Toleriane Double Repair Face Moisturizer ($23.99) in the exact center. Then I carefully arrange smaller items around it. I leave exactly one inch of negative space between every single item. I use a cheap plastic ruler to measure the gaps. I place a 0.5 oz tube of The Inkey List Caffeine Eye Cream ($10.99) parallel to the moisturizer. Everything must be perfectly straight. If a tube is angled even slightly, the whole grid looks sloppy. I use tiny pieces of sticky tack (about $2.50 at Target) under round bottles to stop them from rolling. This keeps everything frozen in place while you stand directly over the board.
11. Prep Your Hands Like a Hand Model

Sometimes a photo needs a human touch. But bad hands ruin good photos. I tried taking a picture holding a 1 oz bottle of Mad Hippie Vitamin C Serum ($33.99). My cuticles were dry, my nail polish was chipped, and my knuckles looked red from the cold. The photo was embarrassing. If you’re going to show your hand, you need to prep it like a model. I spend ten minutes rubbing a generous dime-sized dollop of 3 oz L’Occitane Shea Butter Hand Cream ($30.00) into my skin. I use a simple, sheer pink polish. I buy the 0.5 oz Essie Nail Polish in Ballet Slippers for $10.00 at CVS. Clean, neutral nails won’t distract from the product. I hold the serum bottle lightly, using just my fingertips. Don’t grip it like a baseball bat. I let the natural window light hit the back of my hand to smooth out the skin texture. You can also just show a single finger swiping a dollop of cream. I do this with the 1.7 oz Dr. Jart+ Ceramidin Cream ($48.00). The thick, buttery texture looks amazing being gently pushed across a clear board by a manicured fingertip.
12. Create Fake Window Shadows with Cardboard

Soft light is great, but sometimes you want bold drama. I saw these amazing photos with sharp, geometric shadows and tried to recreate them. I put a 1 oz bottle of KraveBeauty Great Barrier Relief ($28.00) on my patio in the blazing noon sun. The plastic bottle melted slightly, and the photo was completely overexposed. Total fail. You have to control the hard light indoors. I bought a cheap 50-watt LED spotlight from Amazon for $25.99. I set it up in my dark bedroom. I cut long, thin slits into a piece of scrap cardboard from an old Costco box. I hold the cardboard about twelve inches in front of the light. This creates a fake window blind effect. I aim the striped shadows directly across a 4 oz glass jar of Youth To The People Superfood Cleanser ($39.00). The sharp, dark lines cut across the bright green liquid. It looks incredibly moody and expensive. You can also use real palm leaves to cast tropical shadows. I bought a fake Monstera leaf from Target for $5.00. I hold it off-camera, right in front of the spotlight. It casts a beautiful silhouette.

Masirs Clear Makeup Organizer
A dependable everyday pick — Masirs Clear Makeup Organizer – 16-Compartment Cosmetic and Jewelry Ho pulls in 258 ratings at 4.5 stars. Not flashy, just solid.
13. Stop Over-Editing with Orange Presets

Editing is where most people destroy their photos. I used to slap heavy, orange-tinted presets on absolutely everything. I turned a beautiful, clear 1.7 oz jar of Clinique Moisture Surge ($46.00) into a muddy, brown mess. The pink gel looked like rust. It was awful. You need to keep the product colors totally accurate. I use the Adobe Lightroom mobile app. The premium version costs $4.99 a month, and it’s totally worth it for the healing brush alone. No matter how much you clean, dust always shows up on glass. I spend ten minutes zooming in and tapping away tiny dust specks on a 1 oz bottle of Sunday Riley Good Genes ($85.00). I never touch the saturation slider. Instead, I bump up the exposure slightly and increase the whites. This makes the background look incredibly clean and bright. I also drop the warmth down just a tiny bit. Most indoor photos pull too yellow. Cooling the temperature makes the white backgrounds look pure and crisp. Consistent, clean editing is the final step.
Taking the perfect skincare aesthetic picture takes a ton of practice, patience, and a ridiculous amount of Windex. I’ve ruined so many shots by rushing the process or using terrible overhead lighting. But once you finally get that crisp, glowing photo of your favorite daily serum, it’s incredibly satisfying. Stop settling for blurry bathroom selfies. Try out that glycerin water trick or grab a heavy piece of marble from Home Depot this weekend. You’ll be amazed at the difference it makes. Pin this guide to your favorite photography board so you can reference these exact product setups and prices the next time you shoot.
Frequently Asked Questions
How do I avoid glare on glass skincare bottles?
You can’t use direct, harsh light. I use a sheer white curtain over my window or a 32-inch diffuser panel with a studio light. This softens the light into a gentle glow, completely eliminating those harsh white glare spots on glossy packaging.
What is the best background for a skincare asthetic picture?
Real textures work best. I highly recommend buying a real 12×24 inch Carrara marble tile from Home Depot for under $10. It stays perfectly flat, looks expensive, and bounces light beautifully, unlike cheap, bubbly contact paper.
How do I make water droplets stay on my products?
Don’t use plain tap water. Mix exactly two tablespoons of water with two tablespoons of vegetable glycerin in a small spray bottle. The glycerin makes the water thick and sticky, so the droplets freeze perfectly on the glass without running.
How do I show the texture of a thick face cream?
Use a stainless steel makeup mixing spatula. Scoop out a half teaspoon of product onto a clear acrylic board, and pull the flat edge of the metal down in one smooth motion. It creates a satisfying, translucent ribbon.
