What’s Inside
- The Ruthless Declutter: Foundation of Your DIY Skincare Organizer
- Organize by Routine Order for Seamless Mornings
- DIY Custom Foam Board Drawer Dividers
- Embrace Clear Acrylic Tiered Organizers
- Repurposing Spice Racks as a Wall-Mounted DIY Skincare Organizer
- Invest in a Skincare Fridge for Sensitive Actives
- Evict Your Products from the Bathroom Humidity
- Upcycle Glass Jars for Eco-Friendly Storage
- Create a Grab-and-Go Vanity Bag System
- Utilize Lazy Susans for Deep Cabinet Corners
Last Tuesday at Target, I dropped my heavy leather purse while scrambling for my car keys, and noticed my face felt tight and dry from the cold wind. When I finally got home to start my routine, I knocked over a wide-open bottle of expensive serum because my vanity was a disaster zone. The sticky, forty-dollar puddle spreading across my tile floor was my breaking point. I decided right then that I needed to build a functional DIY skincare organizer. Building a custom organizer isn’t just about making things look pretty for the internet. Proper storage keeps your expensive formulas from going rancid or separating. I’ve ruined so many good products over the years by storing them wrong. I’m going to show you how I fixed my chaotic vanity, what supplies I bought, and the embarrassing mistakes I made along the way. I tried to organize the lazy way for months before figuring out these systems. Let’s look at the methods that actually work for keeping your routines streamlined.
1. The Ruthless Declutter: Foundation of Your DIY Skincare Organizer

Last month at Whole Foods, I bought a new organic moisturizer. I tried to cram the heavy jar into my overflowing bathroom drawer, but it was so jammed with junk that it wouldn’t open. I yanked the handle hard, and a tube of eye cream shot out, hitting my foot. I realized I had a hoarding problem. Organizer Megan Barnhart says to toss anything you haven’t used in six to twelve months. I dumped everything onto my bedroom rug. I found a crusty bottle of The Ordinary Rosehip Seed Oil ($10.90, 1 oz) from three years ago. The liquid was dark brown. I opened the dropper, and it smelled like old crayons and wet dog. The texture was thick, sticky, and rancid. I tested a drop on my hand, and it gave me an itchy rash within ten minutes. Don’t keep old oils. They go bad fast. I filled a 13-gallon trash bag with expired bottles and separated creams. Take every item out of your space first. Wipe the drawer with a fresh Clorox wipe ($5.49, 75 count). The lemon scent makes the space feel brand new. Only put back the things you plan to use this week.
2. Organize by Routine Order for Seamless Mornings

I used to toss everything into a cheap wicker basket. One morning, I was half asleep and fumbling around. I grabbed my Paula’s Choice 2% BHA Liquid Exfoliant ($35.00, 4 oz) thinking it was my hydrating toner. I poured a puddle into my palm and slathered it on, followed by a strong retinoid. My face burned like a bonfire. My skin was red, peeling, and painful for two days. I had to slather on thick layers of pure Vaseline ($4.99, 7.5 oz) just to handle the sting. I learned that the hard way. Now, I organize by routine order. This visual flow is mandatory. I keep my morning lineup on the far left: gentle cleansers, my Mad Hippie Vitamin C Serum ($29.99, 1.02 oz) from Sprouts, and sunscreen. On the right, I keep my nighttime treatments. My thick CeraVe PM Facial Moisturizing Lotion ($15.99, 3 oz) and chemical exfoliants live there. This separation makes my mornings faster. I never need to squint at labels without my glasses. I just grab the next bottle in line. It removes the guesswork and stops me from burning my face again.
3. DIY Custom Foam Board Drawer Dividers

Generic plastic bins leave weird gaps in my drawers. They slide around, creating a rattling noise that drives me crazy. I decided to make custom dividers. I went to Michael’s and bought a sheet of Elmer’s 5mm thick white foam board ($4.99, 20×30 inches) and clear tacky glue ($3.99, 4 oz). I measured my shallow vanity drawer—15 inches wide and 20 inches deep. I laid out my serum bottles to see how much space they needed. I decided to make long slots. I measured strips 42cm long and 5cm wide. These fit my tall, skinny bottles perfectly. Here was my big mistake: I tried cutting the foam with dull kitchen scissors. The scissors crushed the inner core, and the edges looked like a dog chewed them. You need a razor-sharp X-Acto knife ($6.49) and a heavy metal ruler. Score the paper surface first, then press harder to cut through. I used a thin line of hot glue to stick the pieces together. It looks custom and keeps my glass tubes from rolling around. You might also like: 20 Charming Aesthetic Videos Night Routine Skincare You’ll Want to Bookmark

Vtopmart 3 Tier Clear Makeup Organizer with Drawer
A dependable everyday pick — Vtopmart 3 Tier Clear Makeup Organizer with Drawer pulls in 2 ratings at 4.5 stars. Not flashy, just solid.
4. Embrace Clear Acrylic Tiered Organizers

I live in a tiny apartment with zero counter space. I used to line bottles against the mirror, but they tipped over like dominoes. One falling bottle would knock over five others in a crash. I bought the Clear 3-Tier Acrylic Organizer from The Container Store ($24.99, 12x9x6 inches). This display is sturdy and heavy. I put my tallest toners on the top tier. Medium pump bottles go in the middle. The bottom tier holds my small dropper bottles, like my favorite Good Molecules Niacinamide Serum ($6.00, 1 oz). Seeing everything at a glance stops me from buying duplicates. Last year, I bought three identical tubes of Aquaphor Healing Ointment ($5.49, 1.75 oz) at CVS because I kept losing them in my drawer. The clear plastic has one downside. It gets dusty and covered in fingerprints fast. I have to spray it with Windex ($4.29, 23 oz) and wipe it with a microfiber cloth every Sunday. If I skip a week, the acrylic looks cloudy and ruins the clean aesthetic. You might also like: 15 Beautiful Aesthetic Morning Skincare for Any Style
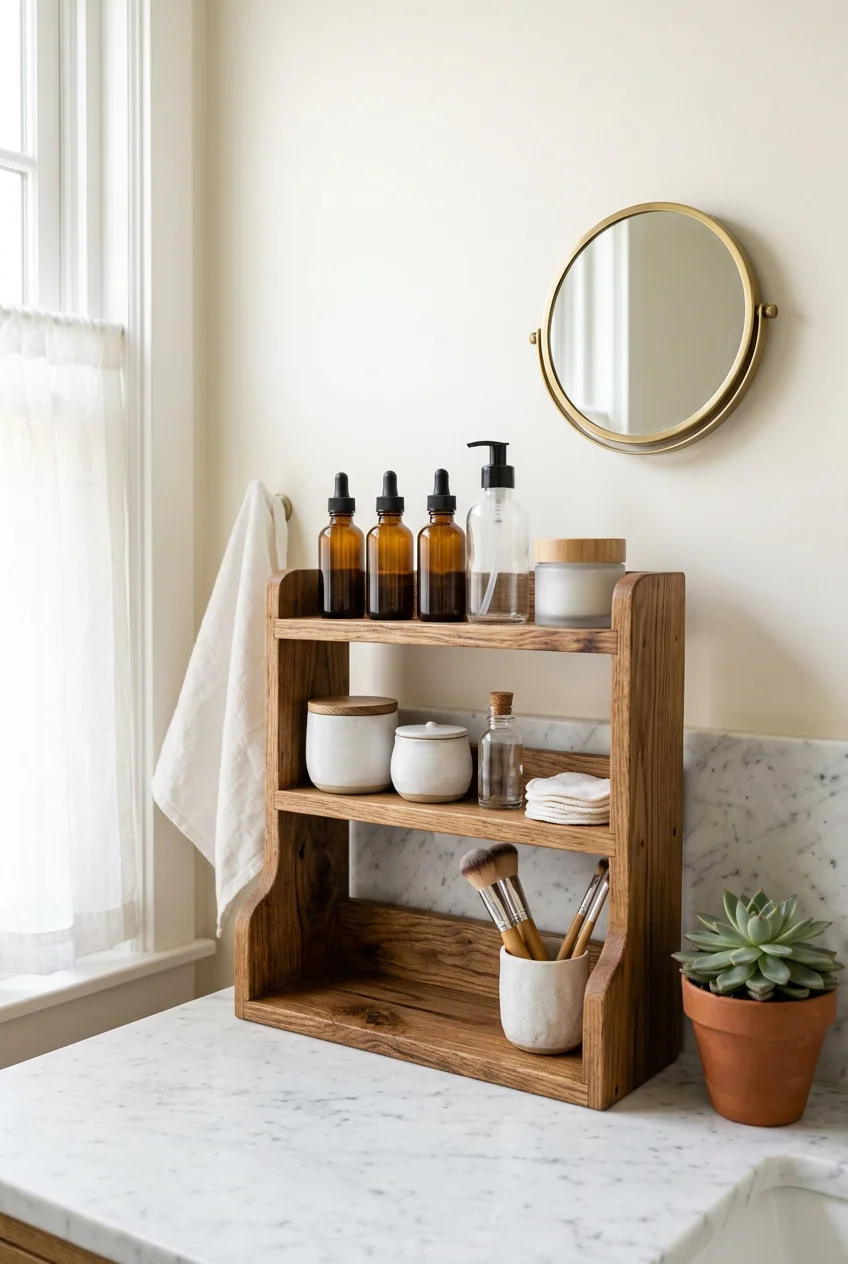
5. Repurposing Spice Racks as a Wall-Mounted DIY Skincare Organizer

I saw a hack about using wooden IKEA BEKVÄM spice racks ($6.99, 15 3/4 inches wide) as floating shelves. I bought four and brought them home. They’re made of solid, unfinished pine. They feel splintery straight out of the box. I sanded them with 120-grit sandpaper until they felt smooth. Then, I painted them with two coats of Behr Premium Plus White Paint ($19.98, 1 quart) from Home Depot to match my walls. I mounted them in a row next to my mirror. They’re the perfect depth for skincare bottles. However, I messed up the installation on the first shelf. I was lazy and didn’t use proper drywall anchors. I screwed the hardware straight into the drywall. Two days later, I placed a heavy jar of night cream on it. The shelf ripped out of the wall, leaving two holes, and crashed to the floor. It shattered a full bottle of Sunday Riley Good Genes ($85.00, 1 oz). The sour smell of lactic acid soaked into my rug. Always take the extra five minutes to install heavy-duty drywall anchors. You might also like: 15 Creative Photography Skincare Products Ideas That Make a Real Difference
6. Invest in a Skincare Fridge for Sensitive Actives

I thought skincare fridges were a gimmick until I started using natural formulas that kept expiring. I bought a pink Cooluli Mini Fridge ($49.99, 4-liter capacity) at Walmart. I keep it on my bedroom desk. I store my unstable Vitamin C serums, depuffing eye creams, and sheet masks inside. The temperature stays around 50 degrees Fahrenheit. Applying a cold gel moisturizer in July feels amazing. It reduces puffiness under my eyes instantly. But you can’t put everything in there. I made the mistake of putting my Aztec Secret Indian Healing Clay mask ($8.99, 1 lb) in there. The cold caused the clay to harden into a rock. I bent a spoon trying to chip a piece out. It ruined the texture. Keep your oils and cleansing balms at room temperature, or they’ll separate. Only refrigerate your water-based serums and toners.
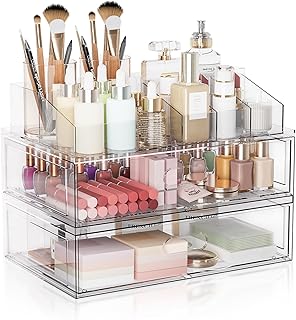
Clear Stackable Makeup Organizer with Drawer
A dependable everyday pick — Clear Stackable Makeup Organizer with Drawer pulls in 306 ratings at 4.5 stars. Not flashy, just solid.
7. Evict Your Products from the Bathroom Humidity

This is the hardest habit to break. I used to keep my creams on a shelf above the toilet. I take hot, steamy showers every morning. The mirrors always fog up. Last winter, I bought a luxurious bottle of SK-II Facial Treatment Essence ($185.00, 7.7 oz) at Costco. I kept it on my wet counter. After two months, the liquid turned cloudy and smelled like fermented apple cider vinegar. The intense heat and humidity had degraded the active ingredients. Dermatologists say to store products in a cool, dry place. I finally listened. I moved my routine to my bedroom. I set up a small desk near my window as a vanity. My products last so much longer now. The textures stay consistent, the oils don’t go rancid, and I don’t worry about mold spores growing inside my jars.
8. Upcycle Glass Jars for Eco-Friendly Storage

I burn a lot of candles. I used to throw the empty jars away. Then I realized they make perfect storage containers. Last week, I burned through a Trader Joe’s Peony Blossom Candle ($3.99, 5.7 oz). The frosted glass jar is heavy and has a pretty shape. Getting the leftover wax out is a pain, though. I used to scrape it with a butter knife. That scratched the glass and made a crumbly mess. The trick is to boil water and pour it into the jar. The hot water melts the wax, and the oils float to the top. Once the water cools, the wax hardens into a disc that you can pop out. I washed the jar with blue Dawn dish soap ($3.29, 16.2 oz) to remove the soot. Now, I use it to hold my bamboo cotton rounds. It looks chic and didn’t cost a dime.
9. Create a Grab-and-Go Vanity Bag System

Some mornings, I’m running so late I don’t have time to sit at my vanity. I need my basics fast. I created a grab-and-go bag for my essentials. I bought a Sonia Kashuk clear plastic makeup bag ($12.99, 8x5x3 inches) at Target. Inside, I keep my EltaMD UV Clear Broad-Spectrum SPF 46 ($41.00, 1.7 oz), a travel-sized Mario Badescu facial mist ($7.00, 2 oz), my Laneige Lip Sleeping Mask ($24.00, 0.7 oz), and a moisturizer. If I’m rushing out, I grab this bag and finish my routine in the driver’s seat while waiting at Starbucks. The clear plastic is crucial. I tried using an opaque canvas pouch, but I could never find anything at the bottom. I’d end up dumping the contents onto my car seat just to find my lip balm. The transparent bag lets me spot what I need instantly.

Masirs Clear Makeup Organizer
A dependable everyday pick — Masirs Clear Makeup Organizer – 16-Compartment Cosmetic and Jewelry Ho pulls in 258 ratings at 4.5 stars. Not flashy, just solid.
10. Utilize Lazy Susans for Deep Cabinet Corners

Under my bathroom sink is a dark, terrifying cavern. I used to shove backup cleansers and giant tubs of lotion in the back and forget they existed. I found three half-empty bottles of Cetaphil Daily Facial Cleanser ($11.49, 16 oz) behind a pile of towels during my last cleanout. To fix this, I bought an OXO Good Grips 11-inch Turntable ($17.99) from Kroger. It has a non-slip rubber base, so it won’t slide on the cabinet floor. I placed all my bulky bottles on the turntable. Now, I just spin the tray to find what I need. No more reaching into the dark and knocking over bottles. Measure your cabinet depth before buying one. I bought a 14-inch turntable first, and the doors wouldn’t shut. I had to drive back to the store on a Sunday to exchange it.
I hope these tips help you conquer your messy vanity. Building a system takes effort, but it pays off. You’ll stop wasting money on expired products, and your routine will feel like a ritual instead of a scavenger hunt. I swear by the clear acrylic tiers and the bedroom storage rule. They changed how I interact with my collection. The tiers save me time. If you found this helpful, please pin this article to your beauty boards so you can reference these measurements later. Don’t be afraid to experiment with different containers until you find the layout that works for your habits. Organization isn’t one-size-fits-all, so make it your own.
Frequently Asked Questions
What is the best material for a diy skincare organizer?
Clear acrylic and custom-cut foam board are my absolute favorites. Acrylic lets you see all your bottles at a glance, while 5mm foam board allows you to build custom compartments that perfectly fit your specific drawers without any annoying gaps.
Should I keep my diy skincare organizer in the bathroom?
No, you really shouldn’t! The intense heat and trapped humidity from your daily hot showers will degrade your expensive active ingredients and cause facial oils to go rancid. I highly recommend moving your organizer to a cool, dry bedroom vanity.
How do I organize my skincare routine steps?
Always arrange your products in the exact visual order you apply them. I keep my morning cleansers and Vitamin C on the left side, and my heavy nighttime moisturizers and chemical exfoliants on the right. It makes early mornings completely foolproof.
What can I repurpose for skincare storage?
Empty glass candle jars are incredible for holding bamboo cotton rounds or makeup brushes. You can also paint cheap wooden IKEA spice racks and mount them to your wall as floating shelves for heavy glass serum bottles and toners.
