What’s Inside
- Embrace Soft, Diffused Natural Light for Your Skincare Profile Picture
- Invest in a Quality Ring Light for Even Illumination
- Studio-Quality Diffusion Using Softboxes
- Capturing Texture Detail with a Macro Lens
- Stabilizing Your Shots with a Tripod
- Showcasing Product Application in Action
- Incorporating Natural Ingredients as Props
- Creating “Hydration in Motion” with Water Elements
- Utilizing Minimalist, Textured Backdrops
- Emphasizing Authentic Texture in Your Skincare Profile Picture
Last Tuesday at Target, I caught my reflection in the self-checkout camera. The harsh fluorescent lights buzzed overhead, casting deep, purple shadows under my eyes. My skin looked gray, flat, and completely dead. I realized right then that my current skincare profile picture looked just like that terrible monitor reflection. Getting a good shot requires understanding how light interacts with the viscosity of your serums and the texture of your pores. I spent three weeks testing different setups in my cramped home office. I spilled water everywhere. I bought the wrong lights. I ruined a good linen shirt with face oil. Learned that the hard way. Most people think you just need a phone and a smile, but the reality is technical. You have to manipulate light to show the finish of your products, whether that’s a matte sunscreen or a glossy night cream. I’ll show you what works, what to buy, and what mistakes to avoid so you don’t waste time or money. Let’s break down the equipment and styling tricks you need to capture your skin accurately.
1. Embrace Soft, Diffused Natural Light for Your Skincare Profile Picture

Natural light is the cheapest, most flattering option, if you know how to control it. I tried shooting a skincare profile picture at noon last month near my kitchen window. The harsh midday sun highlighted every dry patch on my chin and made my nose look flat. The light was so bright I was squinting, creating heavy shadows in the corners of my eyes. Aim for the golden hours, early morning or late afternoon. Position yourself facing a large window so the light wraps around your face. This minimizes harsh shadows and gives your skin a warm, realistic tint. I grab my coffee and sit by the east-facing window in my living room around 7:30 AM. The morning light is soft enough that it doesn’t wash out the subtle pink tint of my favorite moisturizer, the Acure Radically Rejuvenating Whipped Night Cream (1.7 oz for $19.99 at Whole Foods). If the sunlight’s too strong, I tape a thin white bedsheet over the window. The fabric scatters the light, creating a soft wash of illumination. It looks ridiculous to my neighbors, but it works better than expensive photography diffusers.
2. Invest in a Quality Ring Light for Even Illumination

Natural light is great until it rains for four days straight and you’ve got a deadline. I bought the Neewer 18-inch LED Ring Light Kit for $89.99 on Amazon after trying to use my bathroom lights for a shoot. The overhead bulbs at my old apartment cast dark shadows under my eyes and nose, making me look exhausted. A ring light solves this by providing flat, even illumination from all angles. You position the light parallel to your face, right at eye level, so the camera shoots through the center of the ring. I set mine on my desk, and it fills in the shadows around my nose and chin. The Neewer kit comes with a stand and a phone holder, which is convenient for solo shooting. One negative: the plastic stand feels flimsy if you bump it, so I weigh the base down with a heavy statistics textbook. I use the daylight setting on the color temperature dial, which brings out the actual undertones of my skin instead of the yellow, sickly tint you get from standard bulbs. You might also like: 14 Glass Skin Routine for Every Budget
3. Studio-Quality Diffusion Using Softboxes

When I wanted to show the glossy finish of a new face oil, the ring light reflected as a distracting white circle on my forehead. I switched to the Godox SL60W continuous LED light, which costs about $139.00, paired with a 32-inch octagonal softbox. A softbox takes a bright light source and pushes it through layers of translucent fabric. The result is a broad, soft wash of light that mimics a cloudy day. I set this heavy metal stand up in my spare bedroom last Thursday. The softbox smooths out the visual texture of your skin without making it look fake. It emphasizes the natural, dewy glow of your products. Pro tip: Even when you’re shooting indoors with these bright lights, you still need sunscreen. The blue light and UV exposure from sitting in front of intense studio lighting for two hours can trigger hyperpigmentation. I apply a generous 1/2 teaspoon layer of Blue Lizard Sensitive Mineral Sunscreen SPF 50+ (the 5 oz tube is $14.99 at Costco) before I start. The lights generate a lot of heat, so I keep a small fan running to stop my makeup from melting off. You might also like: 15 Lovely Tips Korean Skincare That Changed Everything
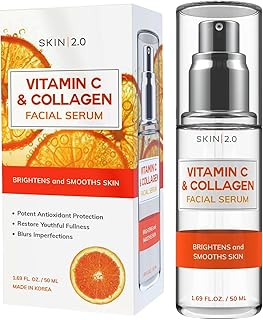
Skin 2.0 Vitamin C Serum – Dermatologist Tested
Skin 2.0 Vitamin C Serum – Dermatologist Tested has been one of the most consistently praised picks in this category. 45 reviewers averaged 4.5/5.
4. Capturing Texture Detail with a Macro Lens

Most phone cameras try to artificially sharpen close-up shots, which ruins the delicate look of skincare products. To show the consistency of a product, you need a macro lens. For my DSLR, I use the Canon EF 100mm f/2.8L Macro IS USM lens. It retails around $899.00, but I bought mine used for $650.00. The heavy glass allows me to capture the individual bubbles inside a gel cleanser. If you’re using a phone, a clip-on macro lens like the Xenvo Pro Lens Kit ($39.99) is a solid, budget-friendly alternative. Last week, I used the macro lens to photograph a pea-sized amount of La Roche-Posay Effaclar Adapalene Gel (1.6 oz for $35.99 at CVS). The lens captured the cloudy, semi-translucent texture of the acne gel on my finger. Without it, the gel just looked like a blurry white blob. The major downside of macro lenses is that the depth of field is shallow. If you breathe heavily or shift your weight by a fraction of an inch, the shot goes out of focus. I have to hold my breath right as I press the shutter.
5. Stabilizing Your Shots with a Tripod

Because macro lenses and low-light settings require absolute stillness, holding your camera is a guaranteed way to get a blurry photo. I tried balancing my phone against a stack of books for months before figuring this out. The phone would slide down the glossy covers right as the timer went off, resulting in photos of my ceiling. I finally bought a basic UBeesize 67-inch smartphone tripod for $25.99. It has a tiny Bluetooth remote, so I don’t have to touch the screen. This prevents the shake that ruins the sharpness. For my heavier DSLR camera, I use a Manfrotto Element MII tripod that costs $139.88. The cold aluminum legs are heavy, but the setup stays rigid. When I’m photographing the application of CeraVe Hydrating Mineral Sunscreen SPF 50 (the 2.5 oz tube runs $16.99 at Walmart), I need both hands free to blend the thick white cast. The tripod holds the framing steady while I work the cream in, allowing me to capture the exact moment the white cast disappears.
6. Showcasing Product Application in Action

The standard flat-lay photo of a bottle sitting on a table is boring and tells the viewer nothing about how the product feels. In 2026, the trend is showing the product actually interacting with your skin. I learned this when a static photo of a moisturizer got zero traction, but a messy, mid-application shot performed well. I like to capture a close-up of The Ordinary Hyaluronic Acid 2% + B5. A 1 oz bottle costs $9.90 at Target. I dispense three clear, viscous drops onto my cheekbone and snap the photo right as they start to slide down. This communicates the slippery, hydrating texture immediately. One mistake I made early on was applying way too much product. I used a full dropper of squalane oil, it dripped onto my collar, and ruined a silk shirt. Use half the amount you think you need. The camera picks up the shine and texture easily, and you won’t end up covered in sticky residue.

COSRX Vitamin E Vitalizing Sunscreen,SPF 50 Face Sunscreen
COSRX Vitamin E Vitalizing Sunscreen punches above its price — 42 buyers rated it 4.5 stars. I would buy it again.
7. Incorporating Natural Ingredients as Props

You can visually explain what a product does by placing the raw ingredients in the background. It provides context and adds organic shapes to the frame. Last Tuesday at Trader Joe’s, I bought a large, spiky aloe vera leaf for $2.99 for a photo shoot. I sliced the leaf open and scooped out 2 tablespoons of the clear, sticky gel to place next to an aloe-based mask. The vibrant green of the rind contrasted perfectly with the white cream. For a coffee body scrub, I scattered 1/2 cup of whole, dark-roast coffee beans across a wooden cutting board. The dry, cracked texture of the beans highlighted the exfoliating nature of the scrub. A common mistake is using fresh ingredients that look unappealing on camera. I once tried to use mashed avocado for a DIY face mask shoot. Within ten minutes under the lights, the avocado oxidized and turned a gross grayish-brown color. Stick to ingredients that hold their shape and color well, like dried citrus slices, raw oats, or fresh rosemary.
8. Creating “Hydration in Motion” with Water Elements

When you’re photographing a hydrating serum, adding actual water makes the product look refreshing and clean. I bought a clear acrylic tray measuring 12 by 12 inches for $18.50 at a craft store. I place it on my desk, pour in 4 oz of distilled water (a gallon is $1.29 at Sprouts), and set the product jar in the middle. By tapping the edge of the tray with my finger, I create small, concentric ripples right as the camera clicks. It gives the image a fluid energy. I also use a small spray bottle filled with 2 oz of water and a single drop of liquid vegetable glycerin. The glycerin makes the water droplets bead up and stick to the packaging without evaporating instantly. I made a huge mess trying this the first time. I knocked the tray over with my elbow and spilled water all over my mechanical keyboard. Now, I strictly do water shoots on my kitchen counter where I can wipe up spills easily. You might also like: 20 Gorgeous Acne Skincare Routine for Any Style
9. Utilizing Minimalist, Textured Backdrops

A busy background distracts from your face and the product. I used to shoot against my living room bookshelf, but the bright colors of the book spines pulled focus away from the clear serums. I switched to using physical backdrop boards from Replica Surfaces. They cost about $77.00 each, but they are rigid, matte, and wipe clean easily. I use a cream-colored plaster texture board. It adds an elegant grittiness to the background without overpowering the subject. Before you place any product on a backdrop, clean it. I wipe down every glass dropper and plastic jar with a microfiber cloth to remove fingerprints and lint. The macro lens will pick up every smudge. I wear cheap vinyl gloves while setting up the shot to prevent natural oils from transferring to the packaging. I buy a box of 100 clear vinyl gloves for $8.49 at Kroger just for styling. The squeaky sound of the gloves rubbing against the glass is annoying, but it saves me an hour of editing later.

Vtopmart 3 Tier Clear Makeup Organizer with Drawer
A dependable everyday pick — Vtopmart 3 Tier Clear Makeup Organizer with Drawer pulls in 2 ratings at 4.5 stars. Not flashy, just solid.
10. Emphasizing Authentic Texture in Your Skincare Profile Picture

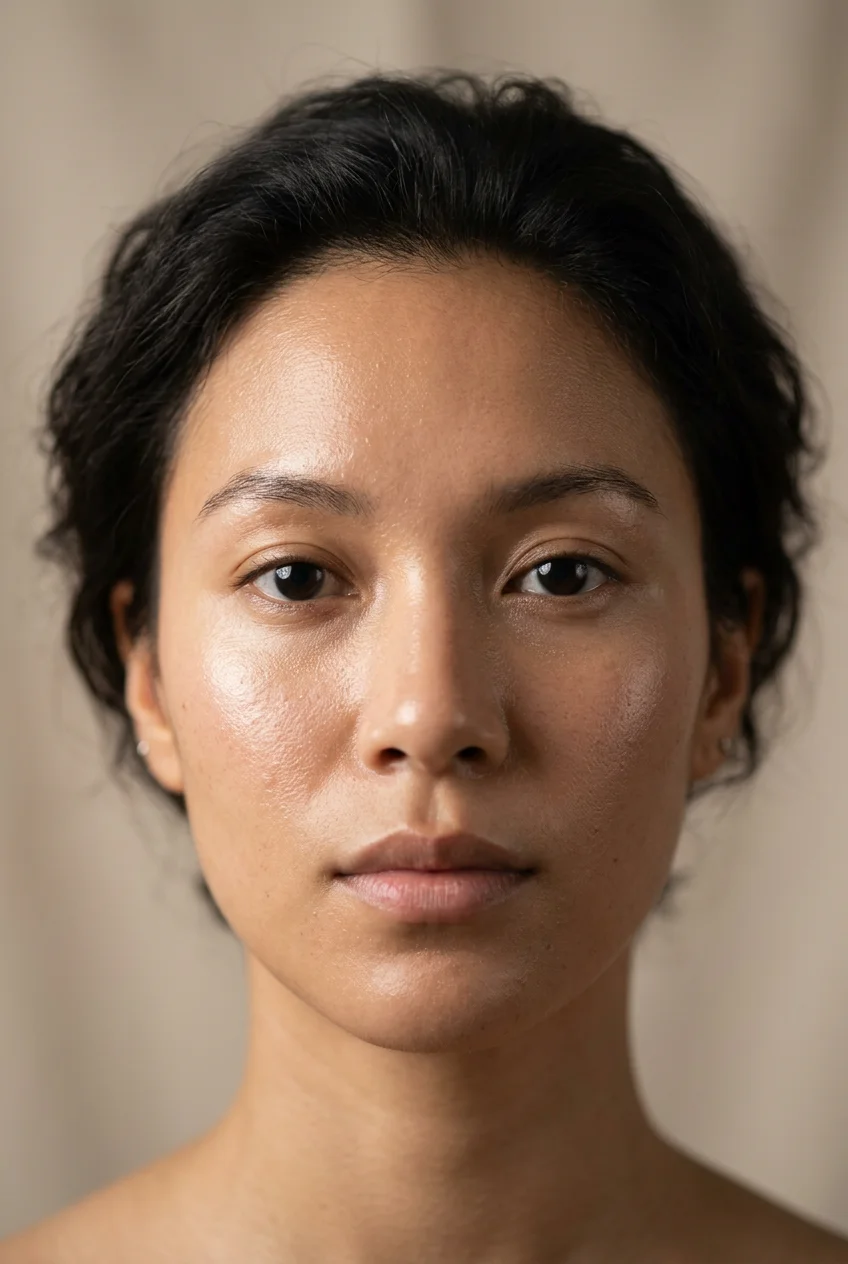
The era of heavily blurred, poreless skin in photos is over. The current standard is authentic skin texture. Viewers want to see that you have pores, fine lines, and occasional redness, because it proves you’re a real person testing real products. When editing my photos in Photoshop, I use the dodge and burn tools to gently lighten harsh shadows, but I avoid the smoothing tools. Over-smoothing creates a plastic, unnatural finish. To get your skin looking its best before a shoot, don’t over-exfoliate. I used a harsh walnut shell scrub three days in a row last year, and my skin barrier was compromised. My face felt tight and looked bright red on camera. Limit chemical exfoliants to 1-3 times a week, and stick to gentle formulas. Also, extend your routine to your neck and chest. I apply 1/4 teaspoon of my daily moisturizer down to my collarbones every morning. The skin there is thin and shows dehydration quickly, so keeping it moisturized ensures your whole profile picture looks fresh.
Getting the lighting and texture right takes trial and error, but the results are worth it. I recommend starting with natural morning light and a cheap tripod before you invest in heavy softboxes or expensive lenses. Once you see how much better your skin looks when the light hits it from the correct angle, you won’t want to shoot any other way. Save this guide and pin it to your photography boards so you have the equipment list ready for your next shoot.
Frequently Asked Questions
What is the best lighting for a skincare profile picture?
Soft, diffused natural light during the early morning or late afternoon is best. It wraps evenly around the face, minimizes harsh shadows, and highlights natural skin texture without washing out your complexion.
Should I blur my skin in a skincare profile picture?
No, avoid over-smoothing your skin. Authentic texture, including visible pores and fine lines, builds trust with your audience. Use light editing to balance shadows, but keep the natural finish intact.
How do I show product texture clearly?
Use a macro lens to capture the fine details of the product. Photograph the product mid-application, like a serum dropping onto your cheek, to demonstrate its viscosity and finish on the skin.
Why do my products look messy on camera?
Cameras pick up fingerprints, dust, and natural oils easily. Always wipe down your product packaging with a dry microfiber cloth before shooting, and consider wearing vinyl gloves while styling the setup.
